Creative Generative Design with Mathematical Marbling
Note: This post was originally a short technical article I shared on the Wolfram Community forum. For an interactive experience with live code or to download this text alongside the source code, please visit the original post here.
See also: Mathematical marbling animation, for even more marbling magic.
Paper Marbling and Mathematical Marbling
What is Paper Marbling?
Ink marbling is the practice of dipping or dripping colorful inks or dyes onto a liquid surface, and swirling, displacing, cutting, dragging, and otherwise forming the ink into a design, often akin to patterns in marble. The earliest verified accounts of ink marbling date back to 12th century Japan, but the practice has a rich history throughout Asia, the Islamic World, and in Europe where it was extensively used to decorate book bindings. In Turkey, the practice is called “ebru” after the Persian word “ebrū”, which means “cloud-like”.
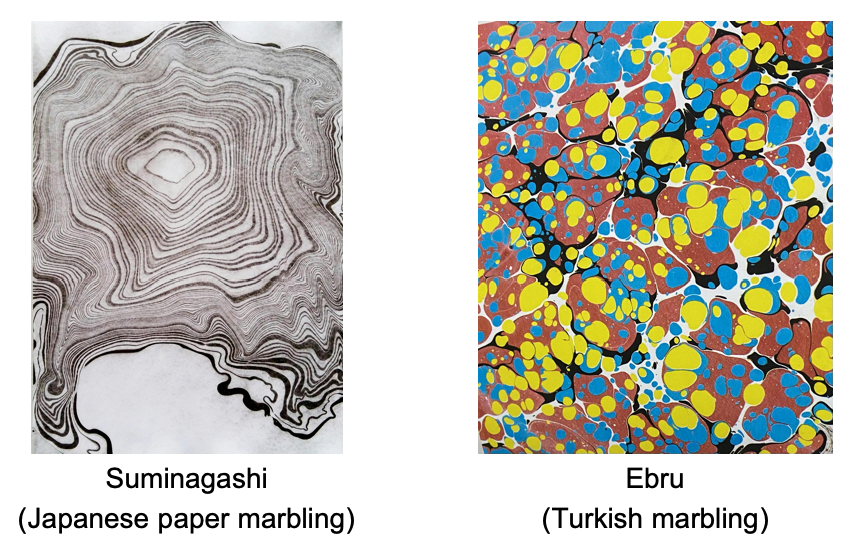
I find ink marbling deeply enchanting. The imprecision of the medium results in organic-seeming, flowing shapes - never perfectly regular or completely random. By combining techniques, artists can create a wide variety of motifs and designs, from waves and spirals to scallop shells, flowers, and trees.
Mathematical Marbling
Mathematical marbling refers to the mathematical reproduction of the marbling process. Aubrey Jaffer has an excellent series of blog posts on the subject on his website. He has also co-authored several papers on mathematical and computational methods for marbling, including on marbling in 3D. In this technical article, I will describe, reproduce, and demonstrate some mathematical marbling methods from his work.
In his blog post The mathematics of marbling, Jaffer outlines several marbling methods that don’t require fluid mechanics theory to perform. This article will explore vector graphics implementations of three of these methods in Wolfram Language, respectively, for dripping ink drops on a marbling canvas such that new drops displace and distort previous ones, for tracing lines through the ink using a pointed object (or tine), and for tracing circles through the ink using a pointed object. The lines and curves produced by displacing ink using a sharp tool like a toothpick are known as tine lines.
For each of these methods, I’ll split my exploration into a short description of the process, an implementation section containing my code, and an exploratory examples section demonstrating how you can use and combine these techniques to produce computational marbling art.
Ink Drop Marbling
Dropping Ink in a Marbling Tank
As we drip ink drops into the marbling tank, new drops will displace old ones such that given a point P, and a new paint drop of radius r centered at C, P will be displaced radially to the position:
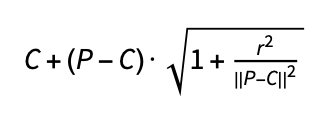
This transformations preserves the area of all neighbourhoods not containing C (though it is not guaranteed to preserve the area of individual polygons due to their finite detail).
Please visit Aubrey Jaffer's website for a more in-depth explanation.
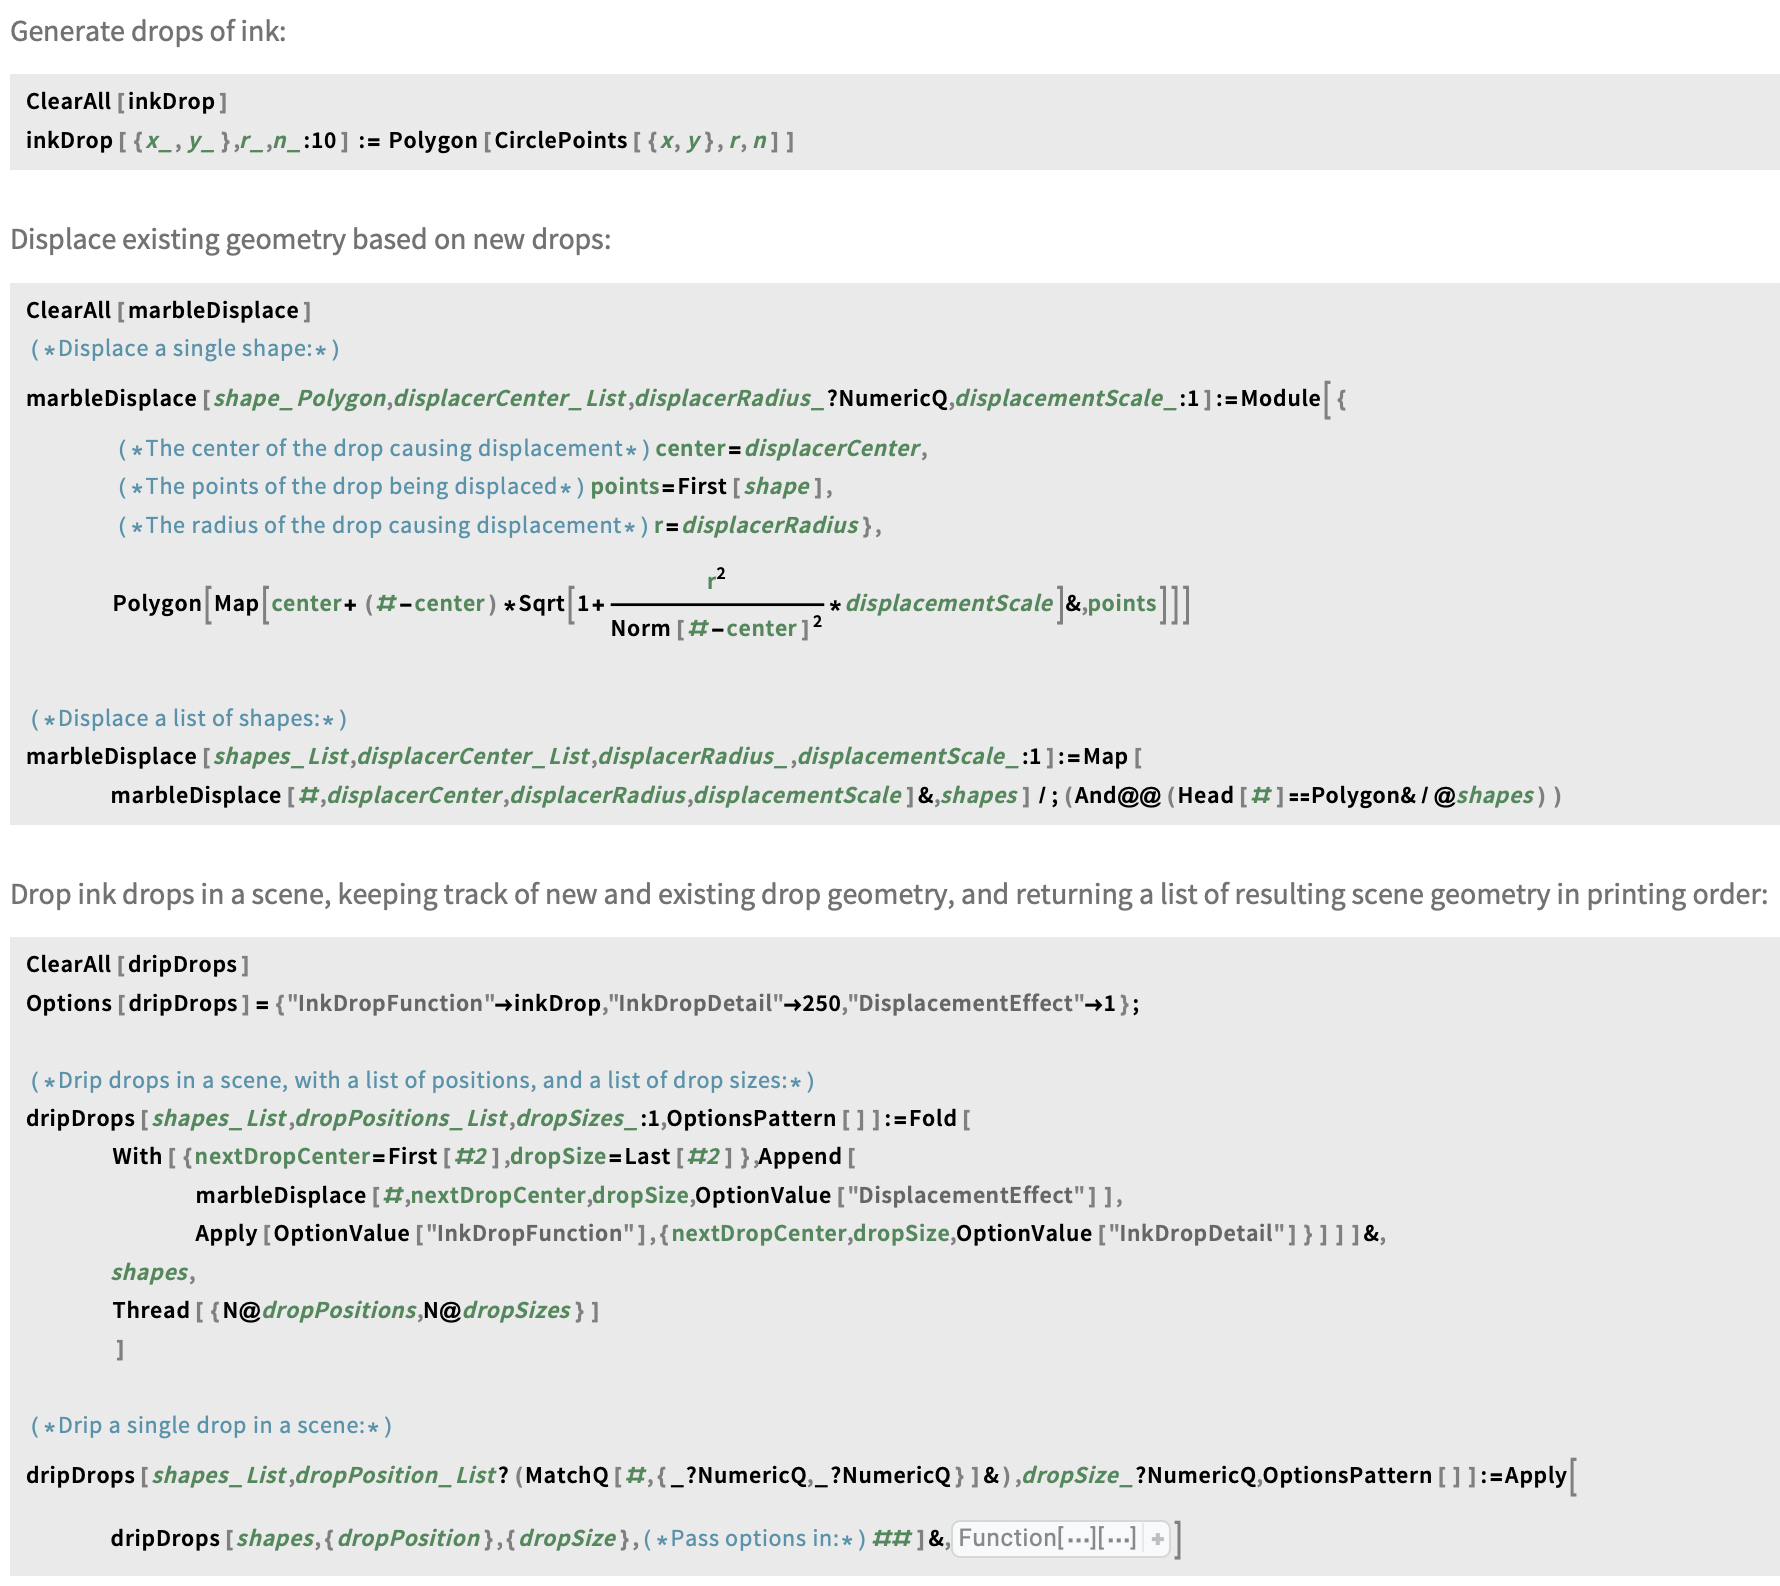
Implementation: inkDrop, marbleDisplace, and dripDrops
To download the original code, please consult the original post here.
Examples
The dripDrops function takes as its arguments:
- A list of polygons, or an empty list defining the existing geometry on the canvas.
- A list defining the sequence of new drop positions.
- A list of drop sizes.
It returns the transformed geometry after dripping. With this function defined, we can begin to make marbling designs.
Basic examples
Drop 5 randomly coloured drops with radius 1 in the same place:

Drop 12 randomly coloured drops with increasing radii in equally spaced intervals on a circle:

Drop 25 randomly coloured identically sized drops randomly dripped in a rectangular region of the marbling tank:
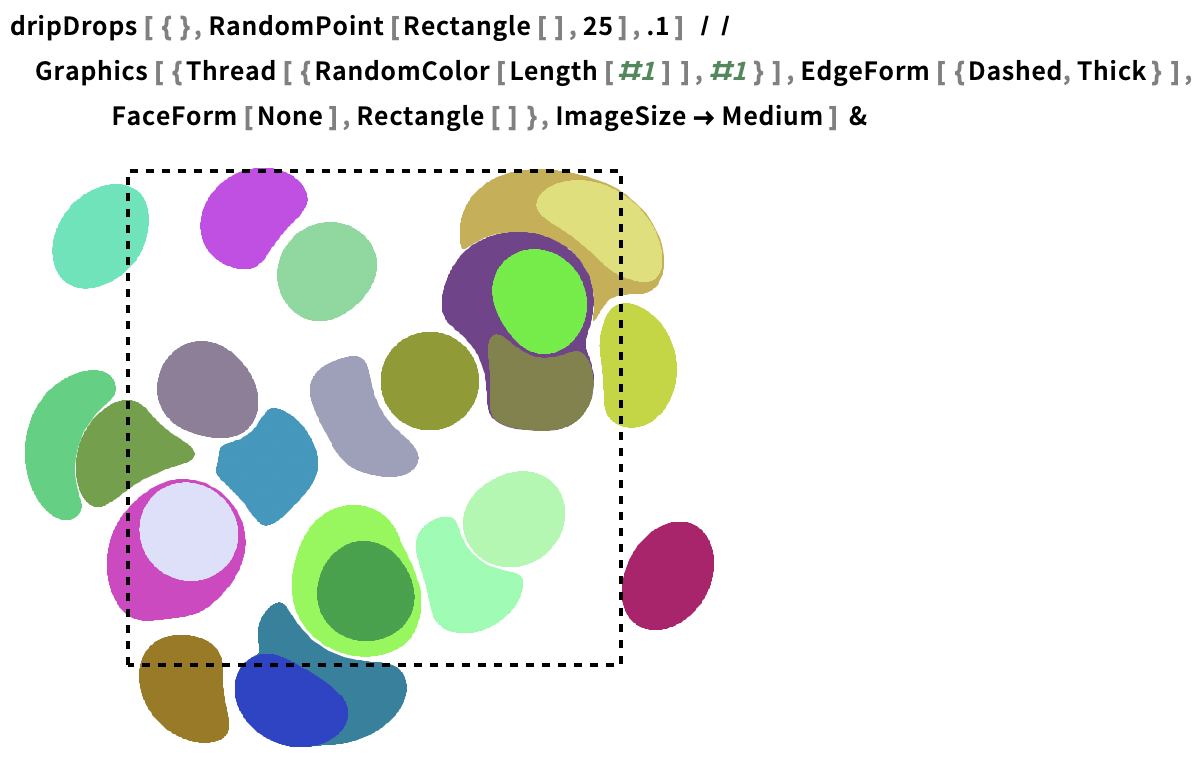
Note that in the displacement process, ink is pushed outside the ink-dropping region.
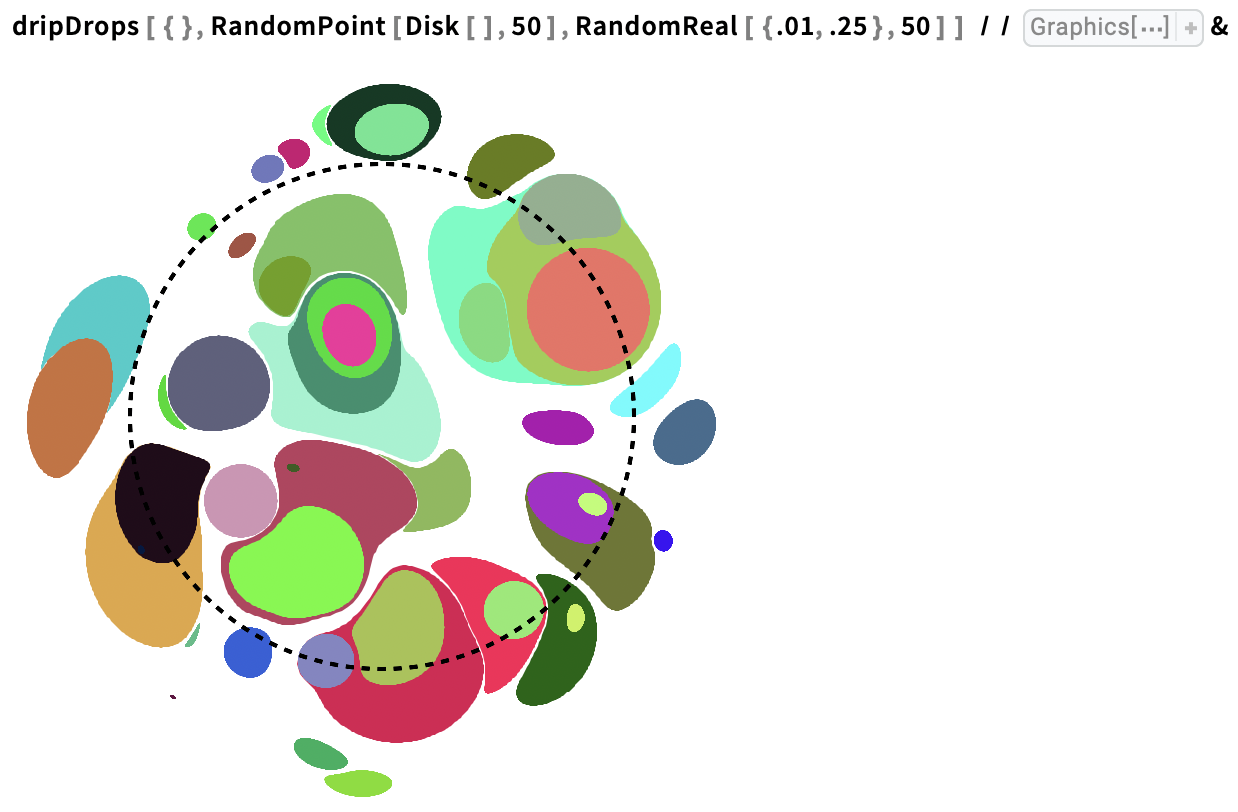
Drop 50 randomly coloured drops with random radii in a defined interval, in random positions in a disk:
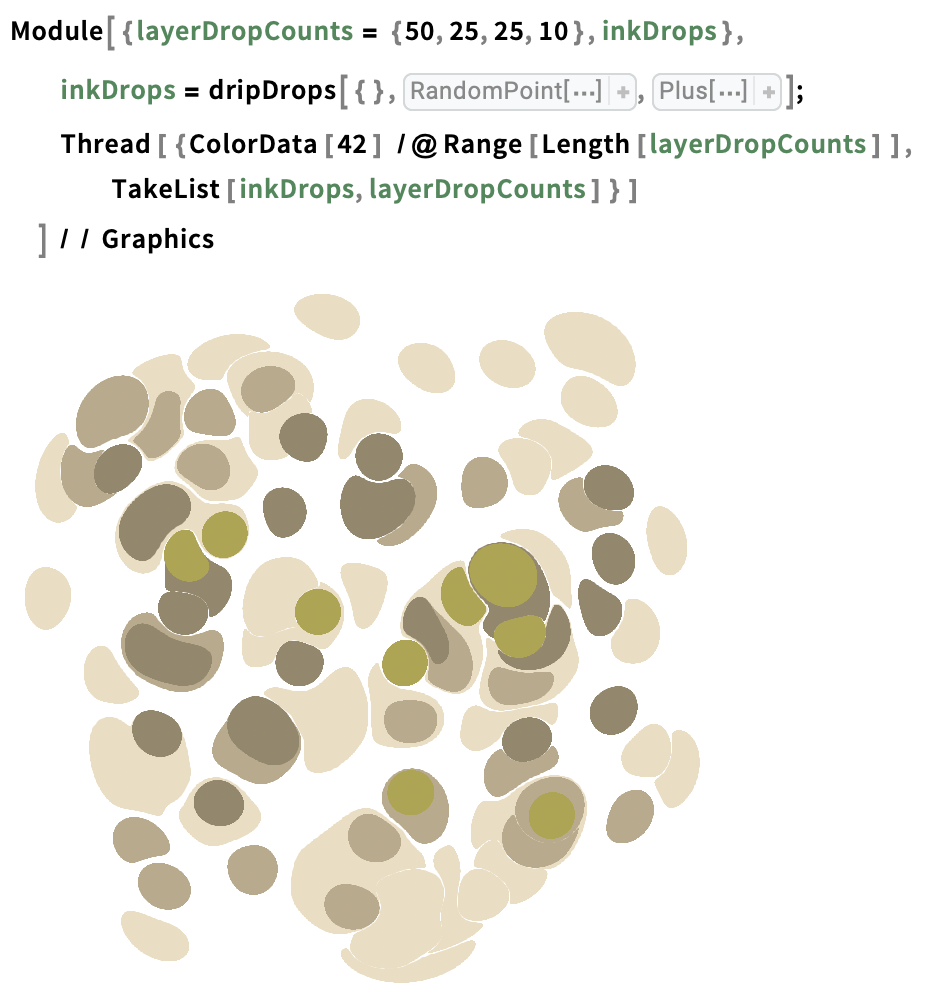
Layered designs
We can create layered designs by partitioning an ordered list of drops such as one generated by dripDrops into groups, and plotting the groups in different colours:
Make a layered design by dropping ink, and interpreting a partition of the result as different colour layers:
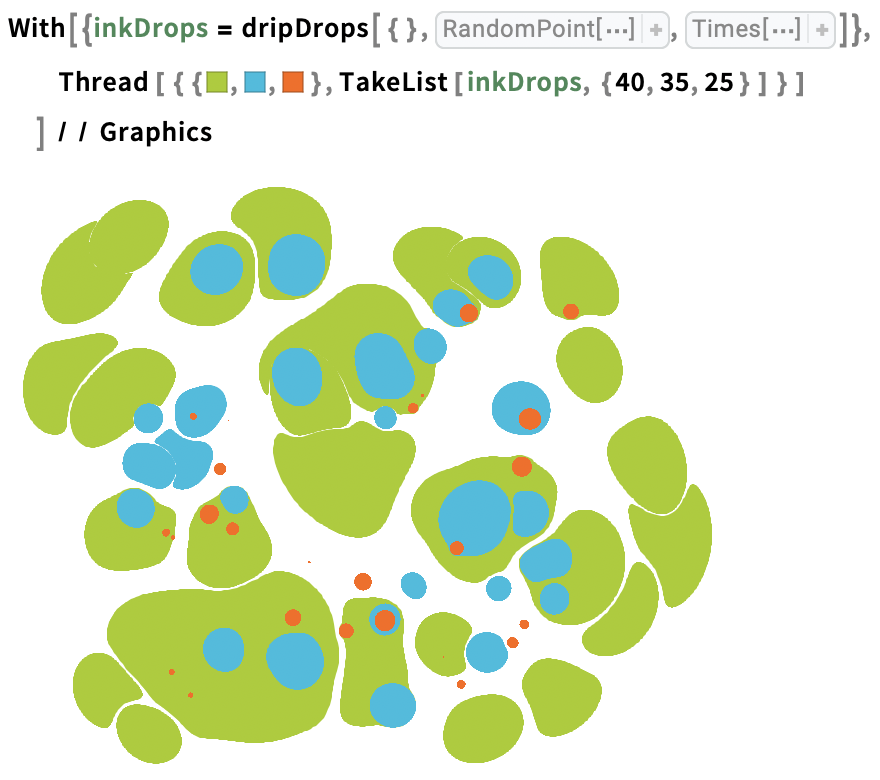
We can design a setup to generate a layered marbling automatically given a list of the numbers of drops in each layer:
Other ink drop shapes
By specifying a different ink drop function to dripDrops with the "InkDropFunction" Option, you can use arbitrary geometry as ink drops:
Define a function to generate n-gons:

Use it as the ink drop function in a dripDrops call:
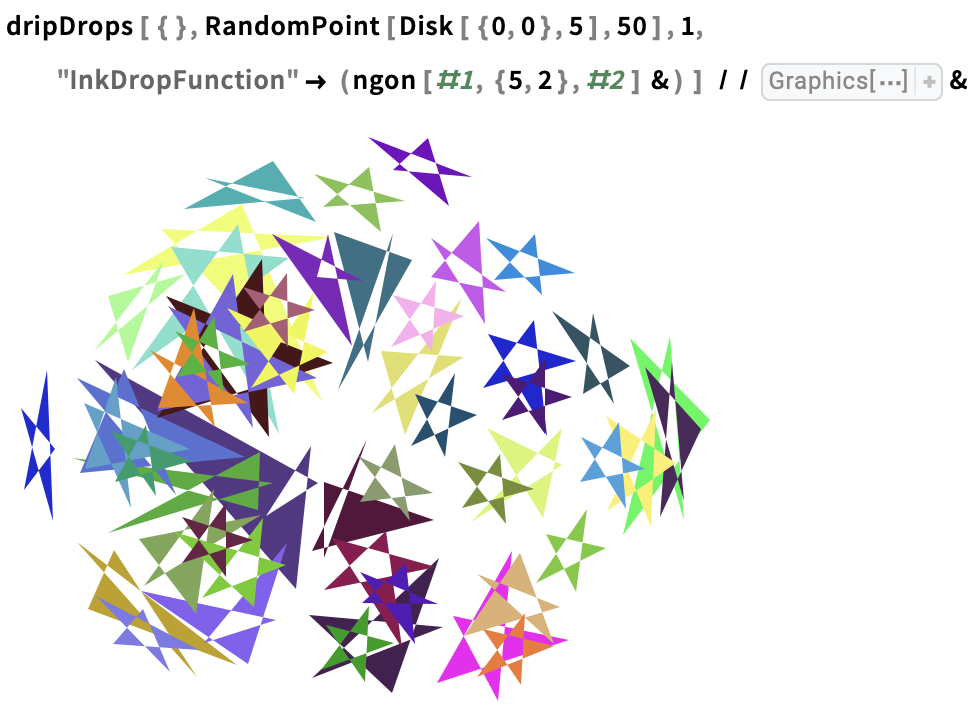
Note that while changing ink drop shapes results in different designs, the method by which points are displaced stays constant.
Filling arbitrary shapes or text with ink drops
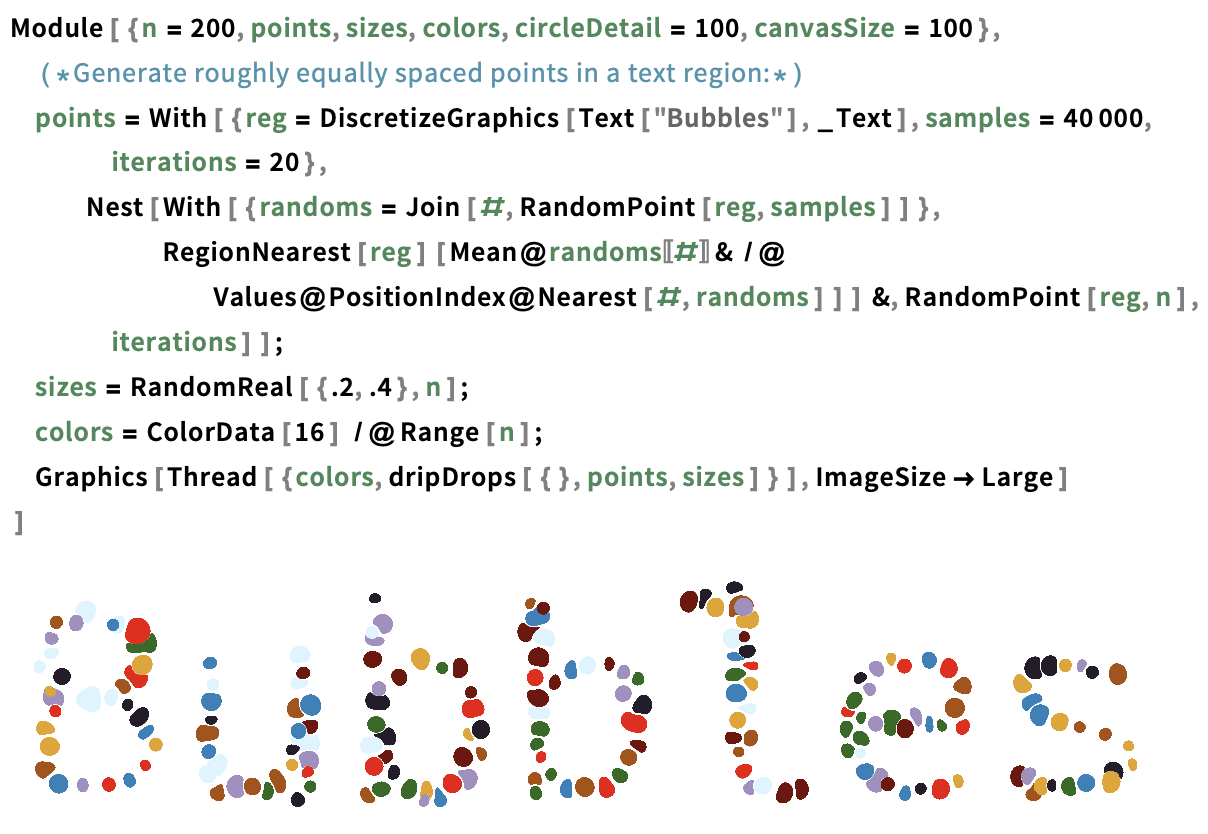
We might naively try to fill a shape by uniformly sampling points from the inside of the shape and dripping at these points. Unfortunately, this tends to be unsuccessful because ink drops push each other outside of the sampled region. One approach to mitigate this effect is to start with equally spaced points in the region, for example using the process described in this StackExchange answer by user kirma for Monte Carlo estimation of Voronoi cell centroids.
Make an ink drop text marbling from roughly evenly spaced points in a text region:
Here's an ink drop marbling from roughly evenly spaced sampled points in France:
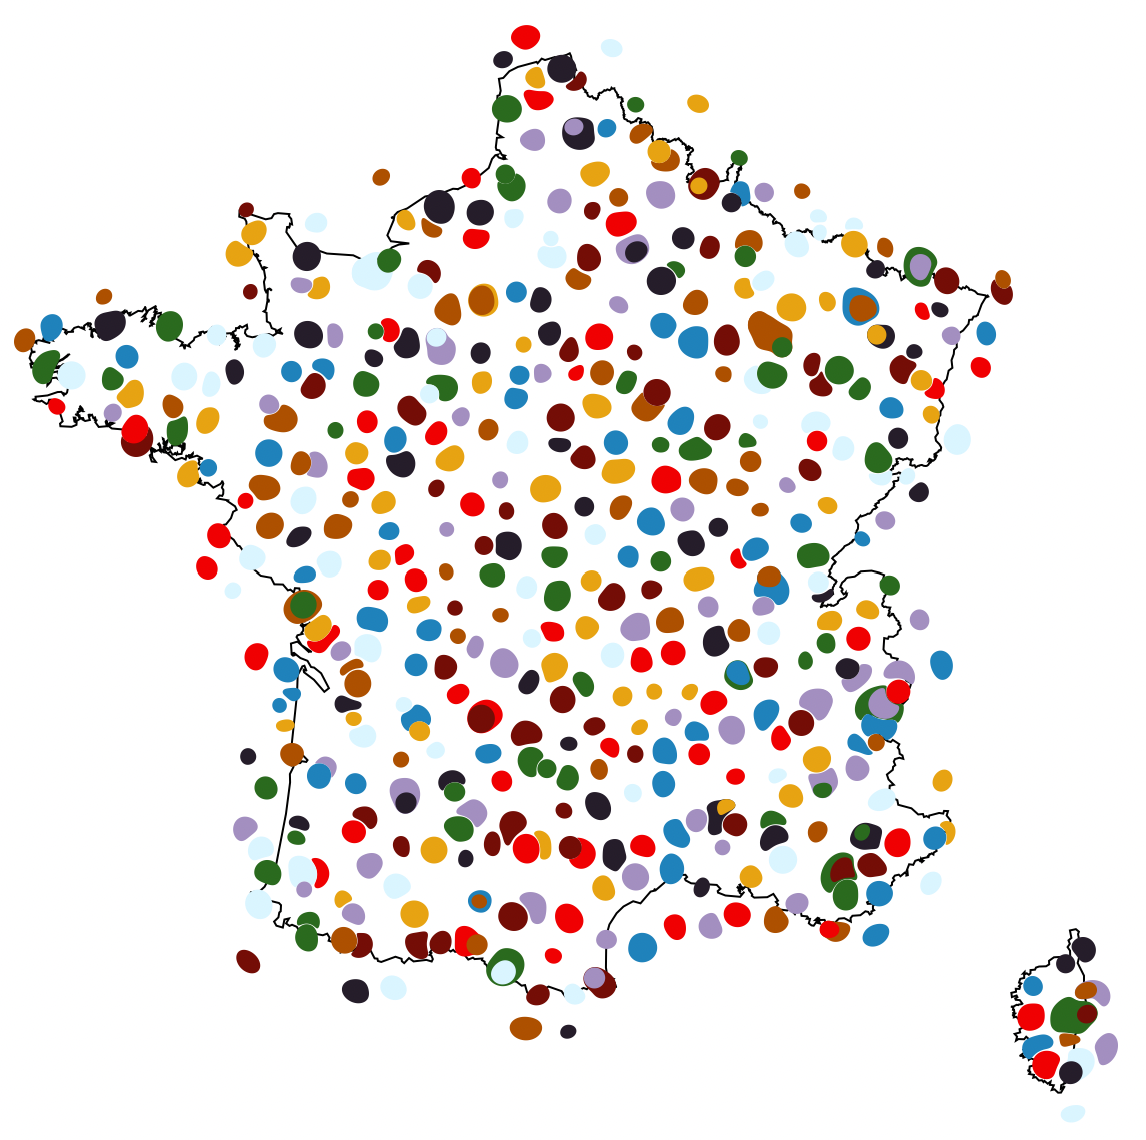
As you can see, there's still some bleeding outside of the regions of interest, but much less than there would be without sampling approximately equally spaced points from the target regions.
Other interesting examples
Displace arbitrary background geometry:
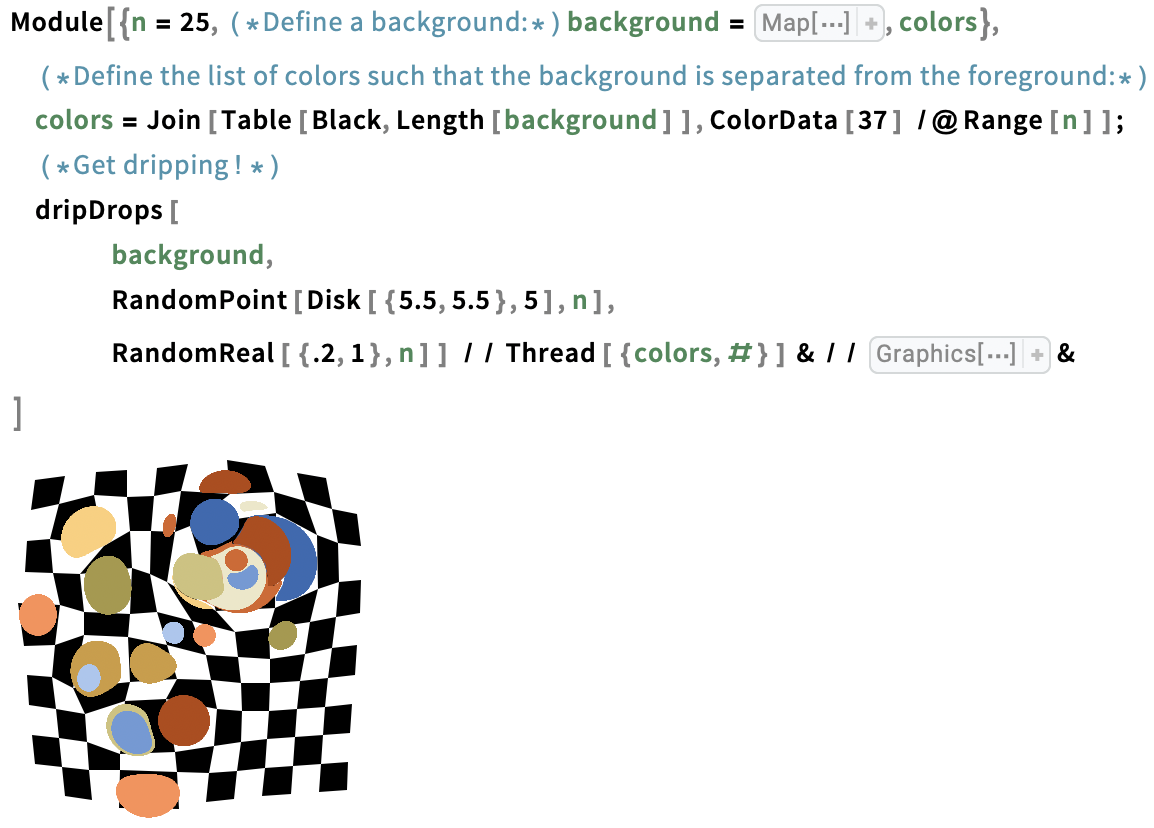
Make multiple full rotations along a circle, dropping ink in regular intervals:
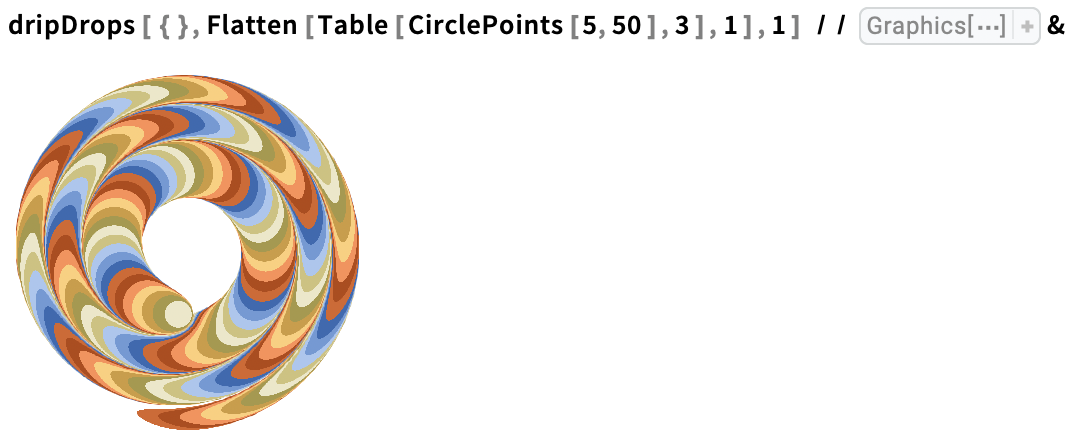
Try these methods yourself. Play around with with different shapes and combine different techniques.
Pin, Comb, and Other Tine Lines
Marbling techniques often involve dragging pointed objects such as needles, pencils, or combs through ink. Displacements created this way are called tine lines.
In the following sections, I’ll implement methods to trace straight infinite tine lines, and tine circles.
Tracing Infinite Lines Through the Ink
Given L, a tine line with arbitrary slope, the vector mapping for a point P is:

Where d is the minimum distance from the point P to the tine line, |(P-B)•N|, N is a unit vector perpendicular to the tine line L, B is a point on the tine line, and M is a unit vector along the tine line. The parameter z controls the maximum displacement of the tine line, and c controls the maximum sharpness of the bends as ink is dragged along the tine line in a laminar flow.
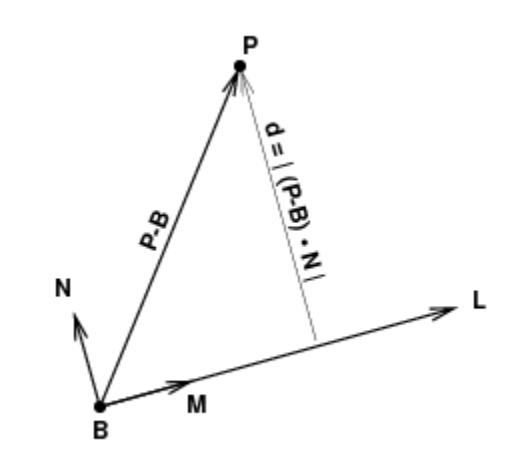
(Illustration courtesy of Aubrey Jaffer)
Please refer to Aubrey Jaffer’s website for a more in-depth explanation.
Implementation: tineLine and combLine
To download the original code, please consult the original post here.
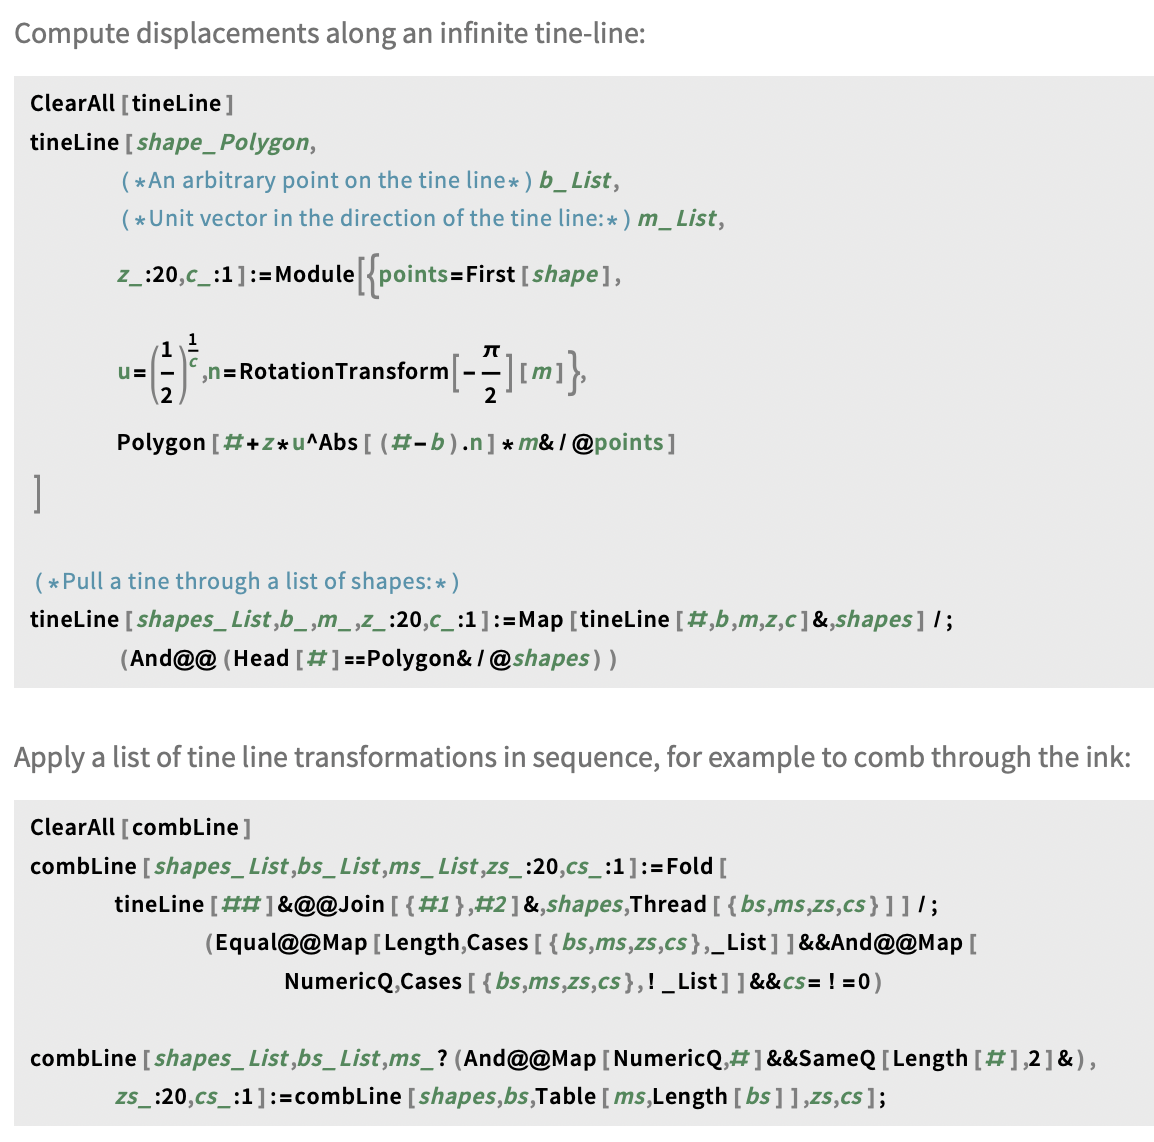
Examples: tineLine and combLine
Distort polygons with a single tine line using tineLine
The tineLine function distorts a polygon along an infinite tine line defined by a point b and unit vector m, alongside the tine parameters z and c. The function takes the following arguments:
- A polygon to distort.
- An arbitrary point on the desired tine line.
- A unit vector in the direction of the tine line.
- The displacement magnitude parameter z.
- The bend sharpness parameter c.
Drag a tine line through a single ink drop:

Drag a tine line through 10 stacked drops:

Distort polygons with an arbitrary number of tine lines using combLine
The combLine function extends tineLine's functionality to allow dragging multiple tines across polygons with a single function call. It takes the following arguments:
- A list of polygons, or empty list representing the canvas, or marbling tank.
- A list of arbitrary points on the desired tine lines.
- A list of unit vectors defining the line directions, or a single unit vector.
- A list of z parameters, or a single z parameter value.
- A list of c parameters, or a single c parameter value.
The function returns the transformed geometry after applying the specified tine transformations.
Make computational latte art by pulling a tine in a line through a stack of ink drops:
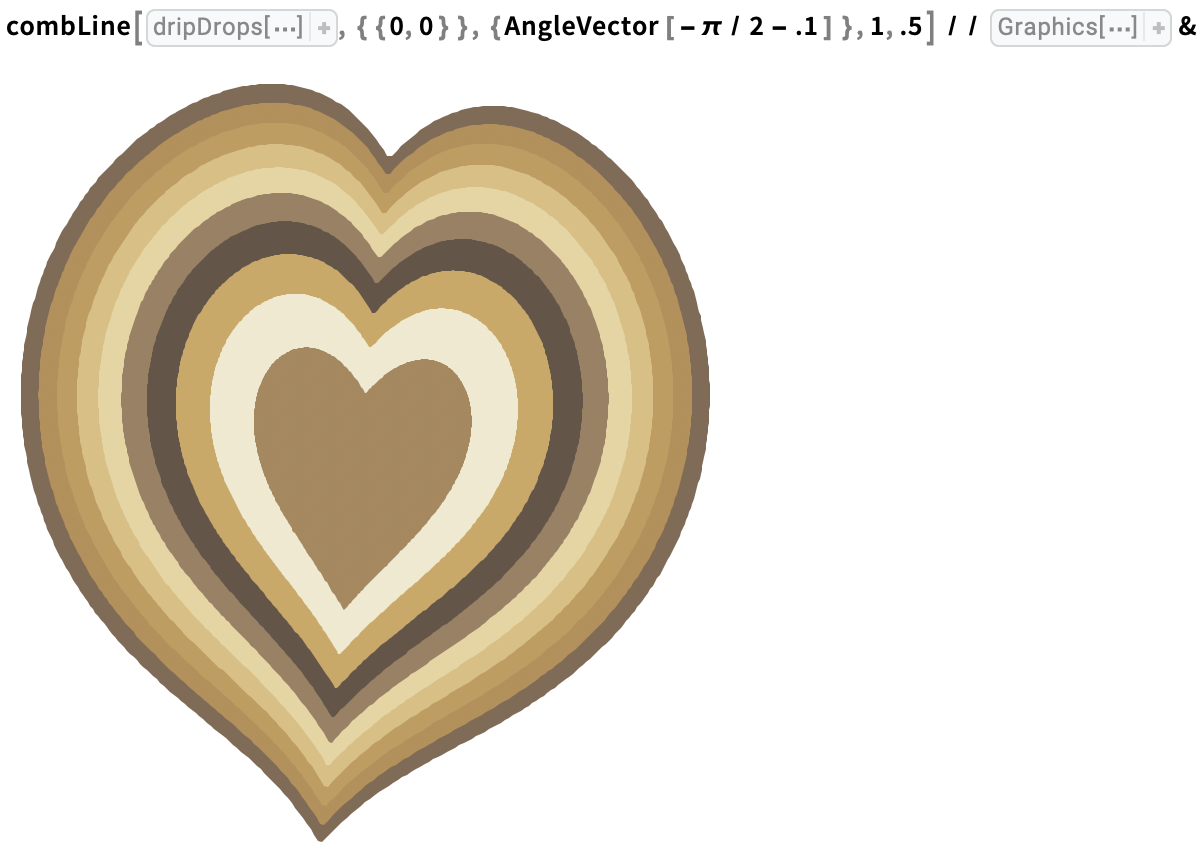
Comb through a stack of ink drops:
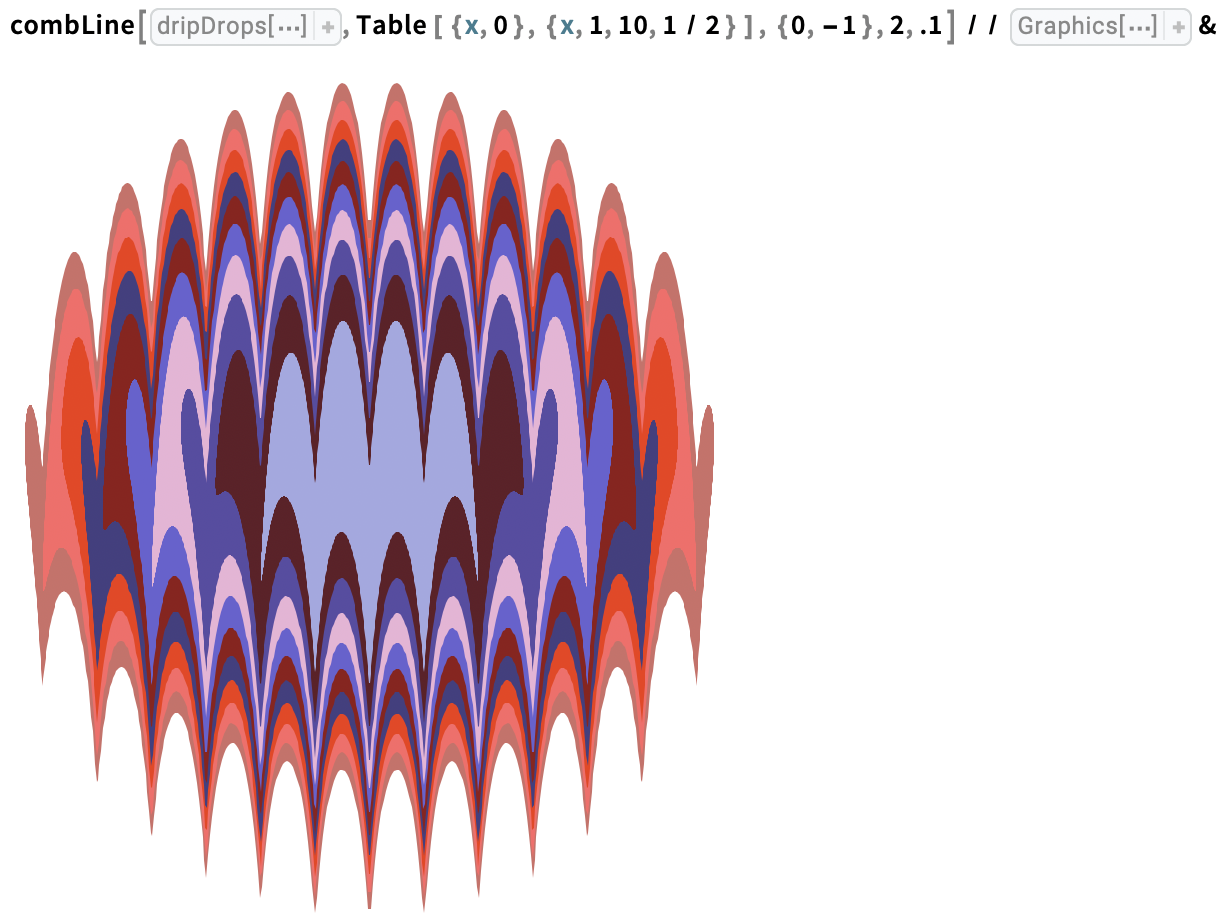
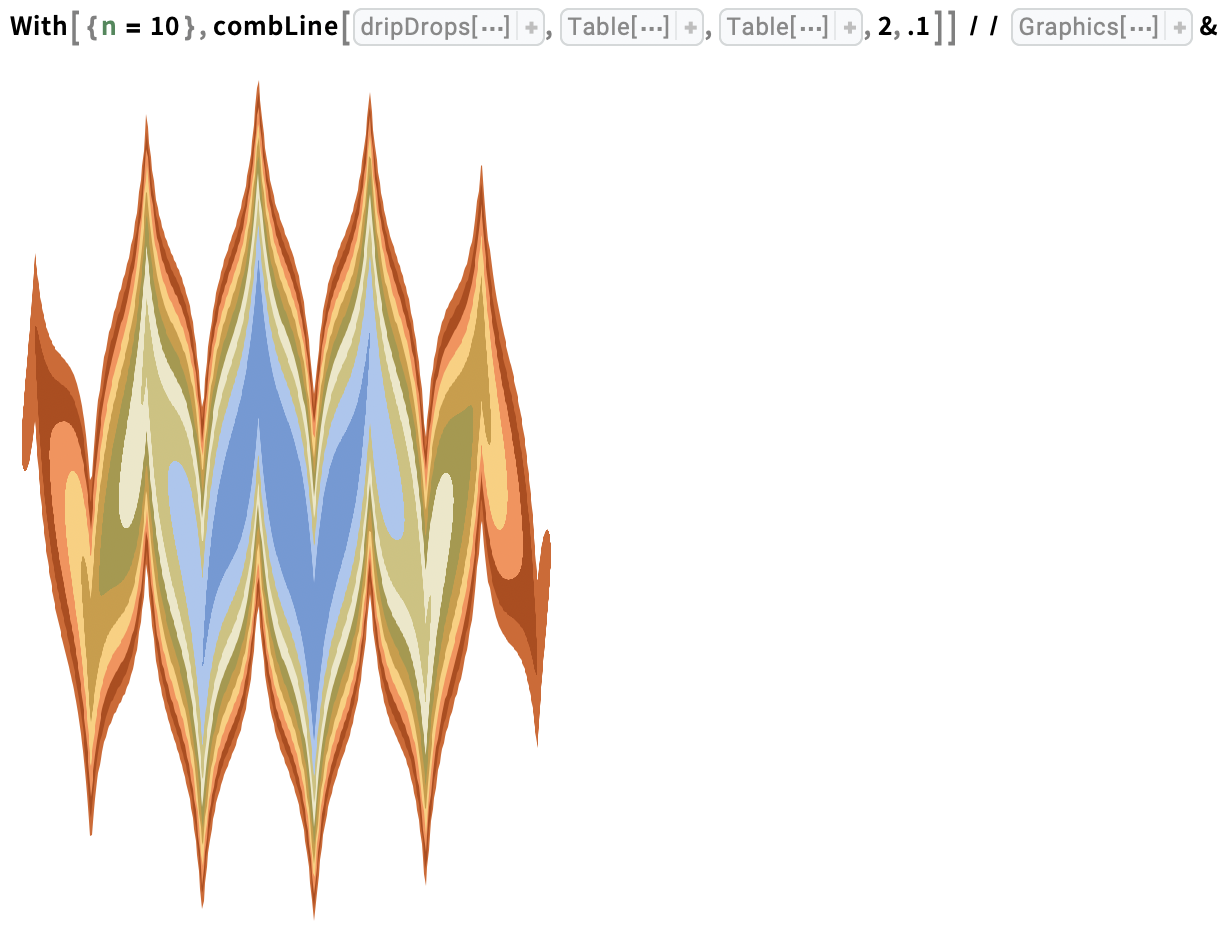
Trace a sequence of parallel tine lines in alternating directions across a stack of ink drops:
Draw tine lines counterclockwise around a point at the centre of a stack of ink drops:
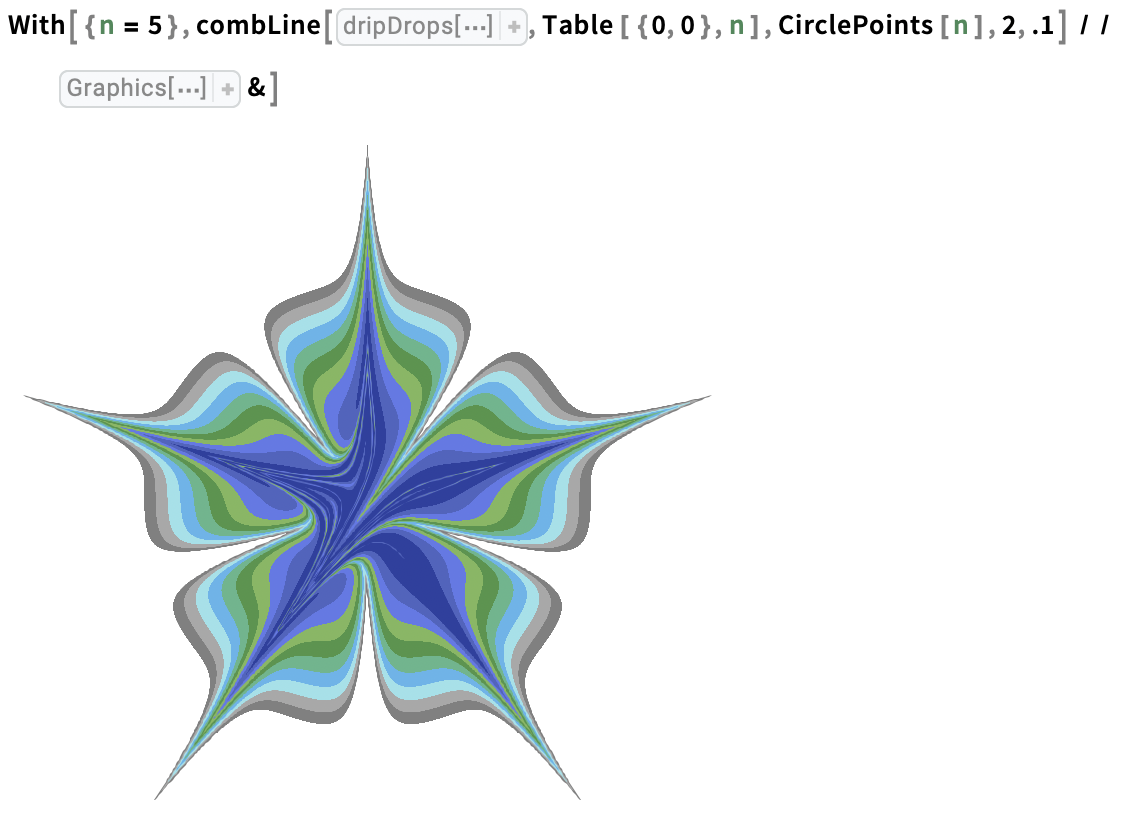
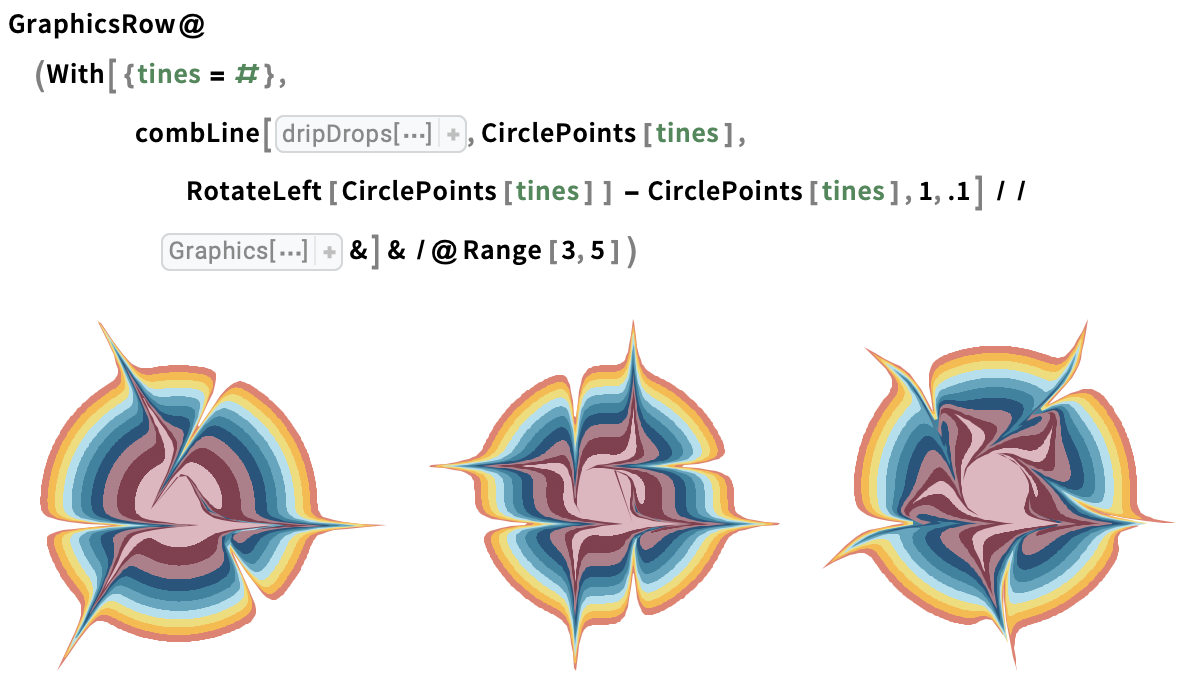
Draw tine lines along the edges of regular polygons, counterclockwise over a stack of drops:
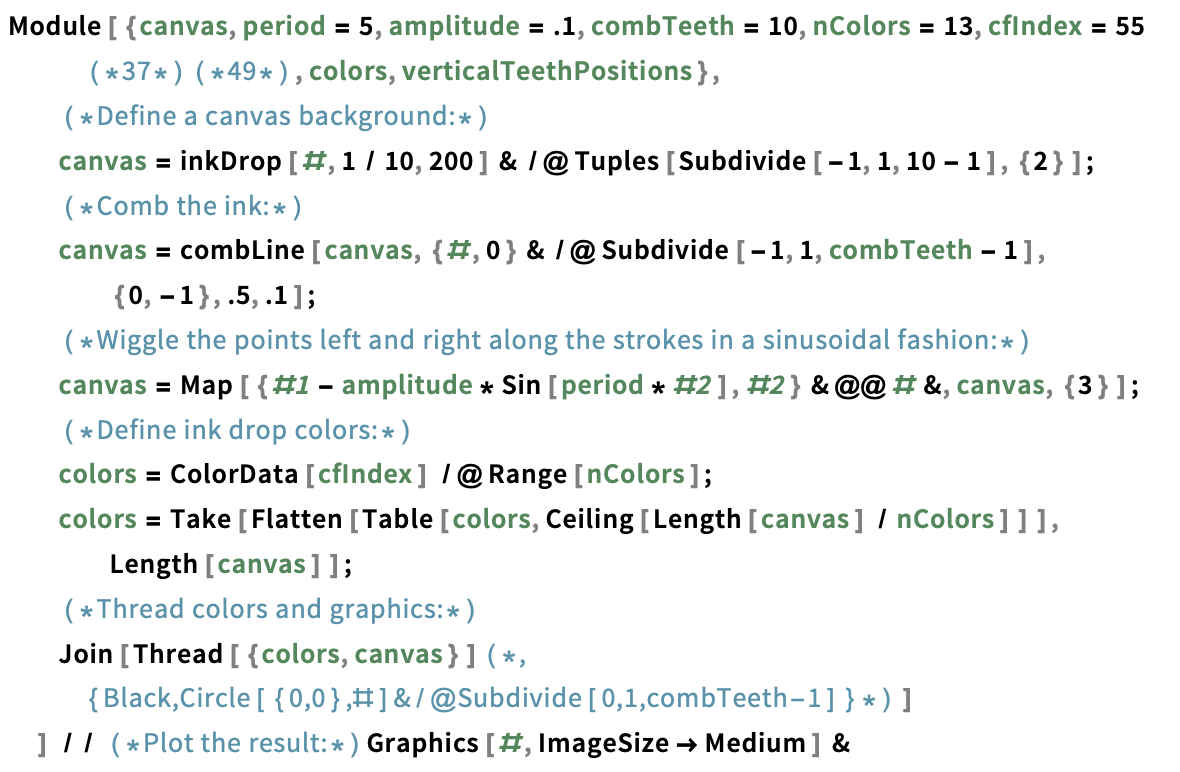
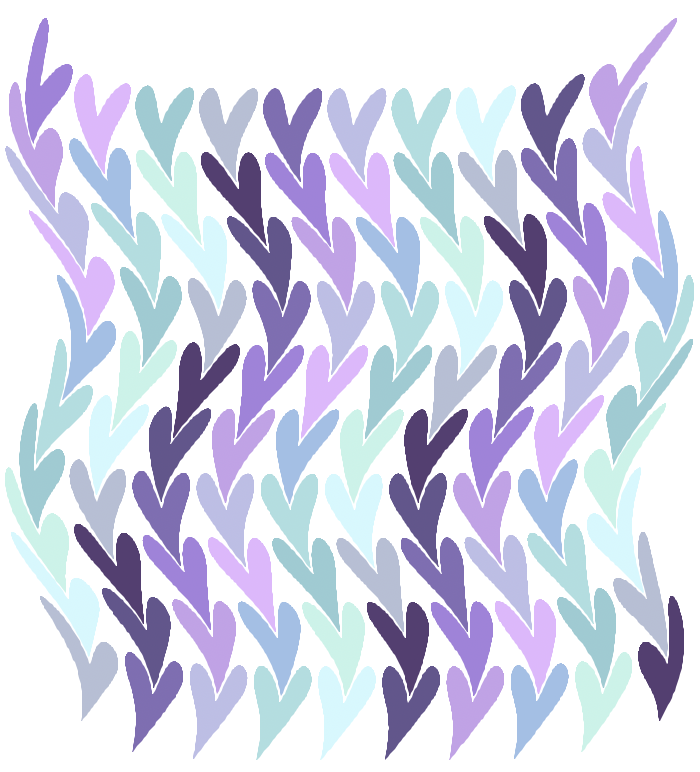
We can also use combLine to draw curved tines. The easiest approach to do this is to cheat somewhat first applying a nonlinear transformation to the canvas geometry, then applying tine lines, and finally reversing the initial nonlinear transformation. For example, we can use this technique to trace sinusoidal tine lines.
Sinusoidal tine lines:
Tracing Circles Lines Through the Ink
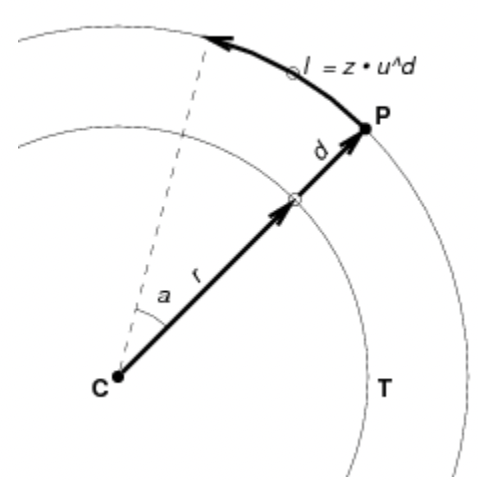
We can also marble by displacing ink along a circle of centre C and radius r. In this case, we can define the mapping from a point P as:

Where a is the angle of the displacement arc,

l is the length of the displacement arc, l=z•u^d, and d is the distance from P to the closest point on the circle, d=|(||P-C||-r)|.
Just as is the case for tine lines, the parameters z and c control the maximum displacement of the tine, and the maximum sharpness of the bends along the tine circle, respectively.
(Illustration courtesy of Aubrey Jaffer)
Please read Aubrey Jaffer’s website for a more in-depth explanation.
Implementation: tineCircle and combCircle
To download the original code, please consult the original post here.
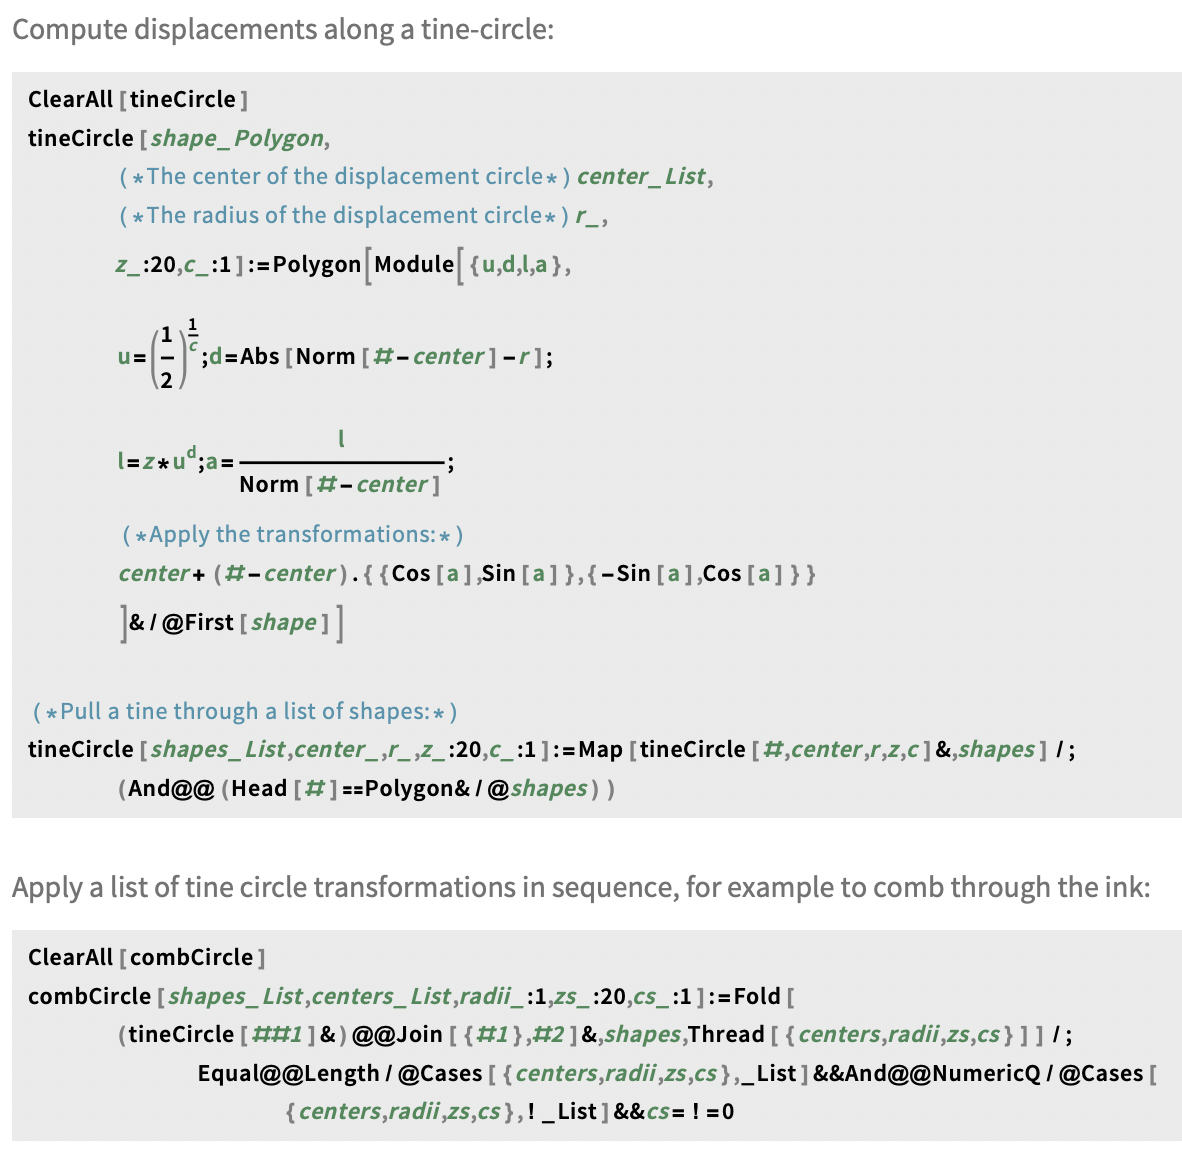
Examples
Distort polygons with a single tine line using tineCircle
The tineCircle function distorts a polygon along a tine circle defined by the central point b and radius r, alongside the tine parameters z and c. The function takes the following arguments:
- A polygon to distort.
- The centre of the desired tine circle.
- The radius of the desired tine circle.
- The displacement magnitude parameter z.
- The bend sharpness parameter c.
Drag a tine circle through a single ink drop:

Drag a tine circle through 10 stacked drops:

Distort polygons with an arbitrary number of tine circles using combCircle
The combCircle function extends tineCircle's functionality to allow dragging multiple tines in circles through polygons with a single function call. It takes the following arguments:
- A list of polygons, or empty list representing the canvas, or marbling tank.
- A list of centre points of the desired tine circles.
- A list of radii of the desired tine circles, or a single radius value for all specified tine circles.
- A list of z parameters, or a single z parameter value.
- A list of c parameters, or a single c parameter value.
The function returns the transformed geometry after applying the specified tine circle transformations.
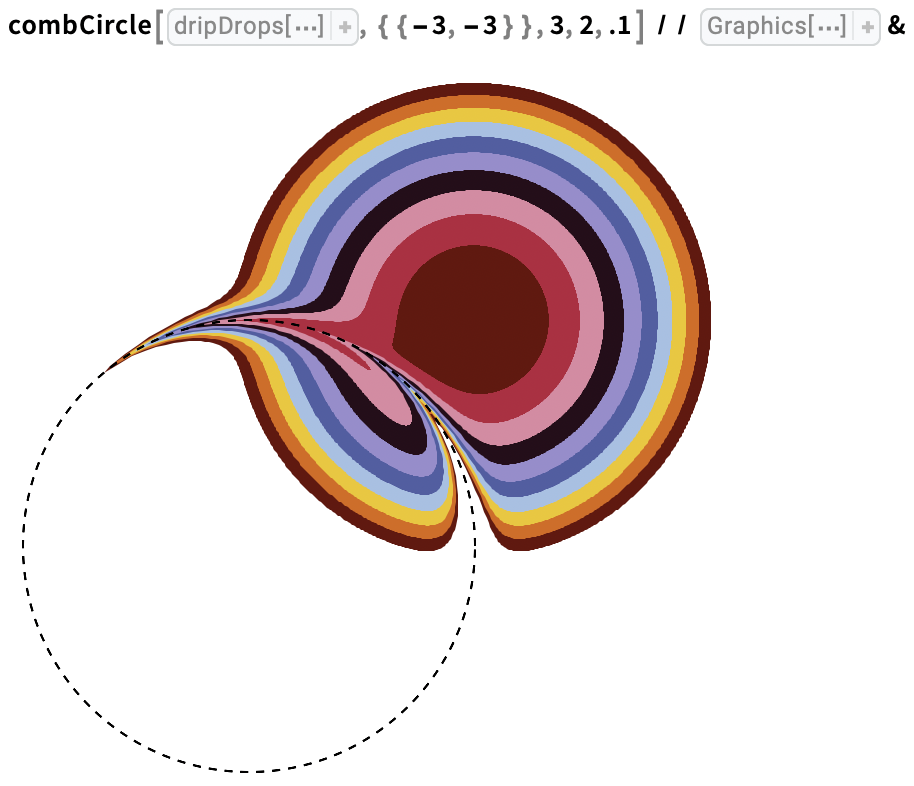
Trace a tine circle through a stack of drops:
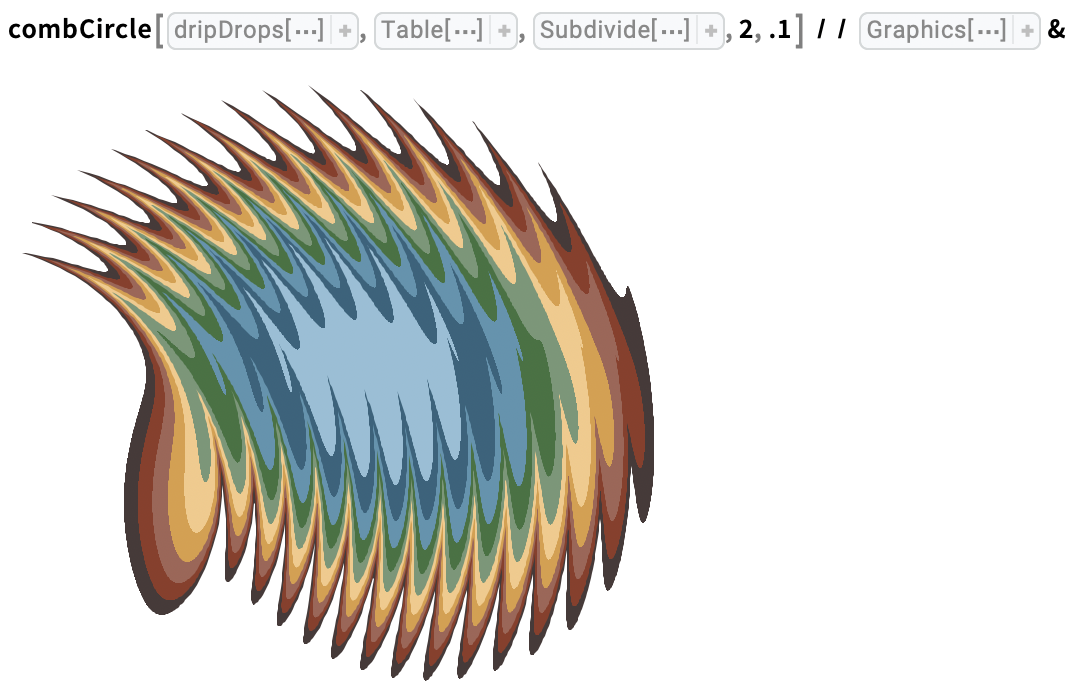
Comb tine circles through a stack of drops:
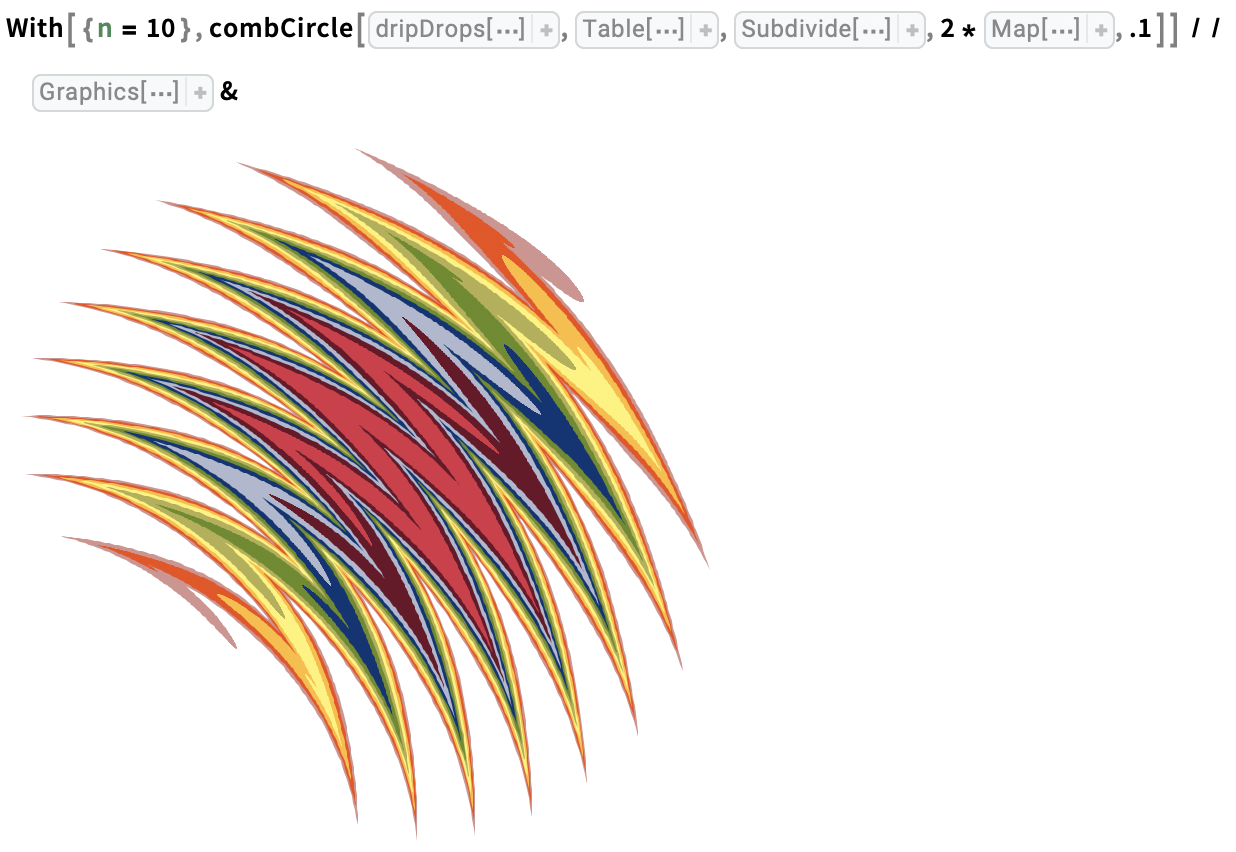
Trace tine circles in alternating directions through a stack of drops:
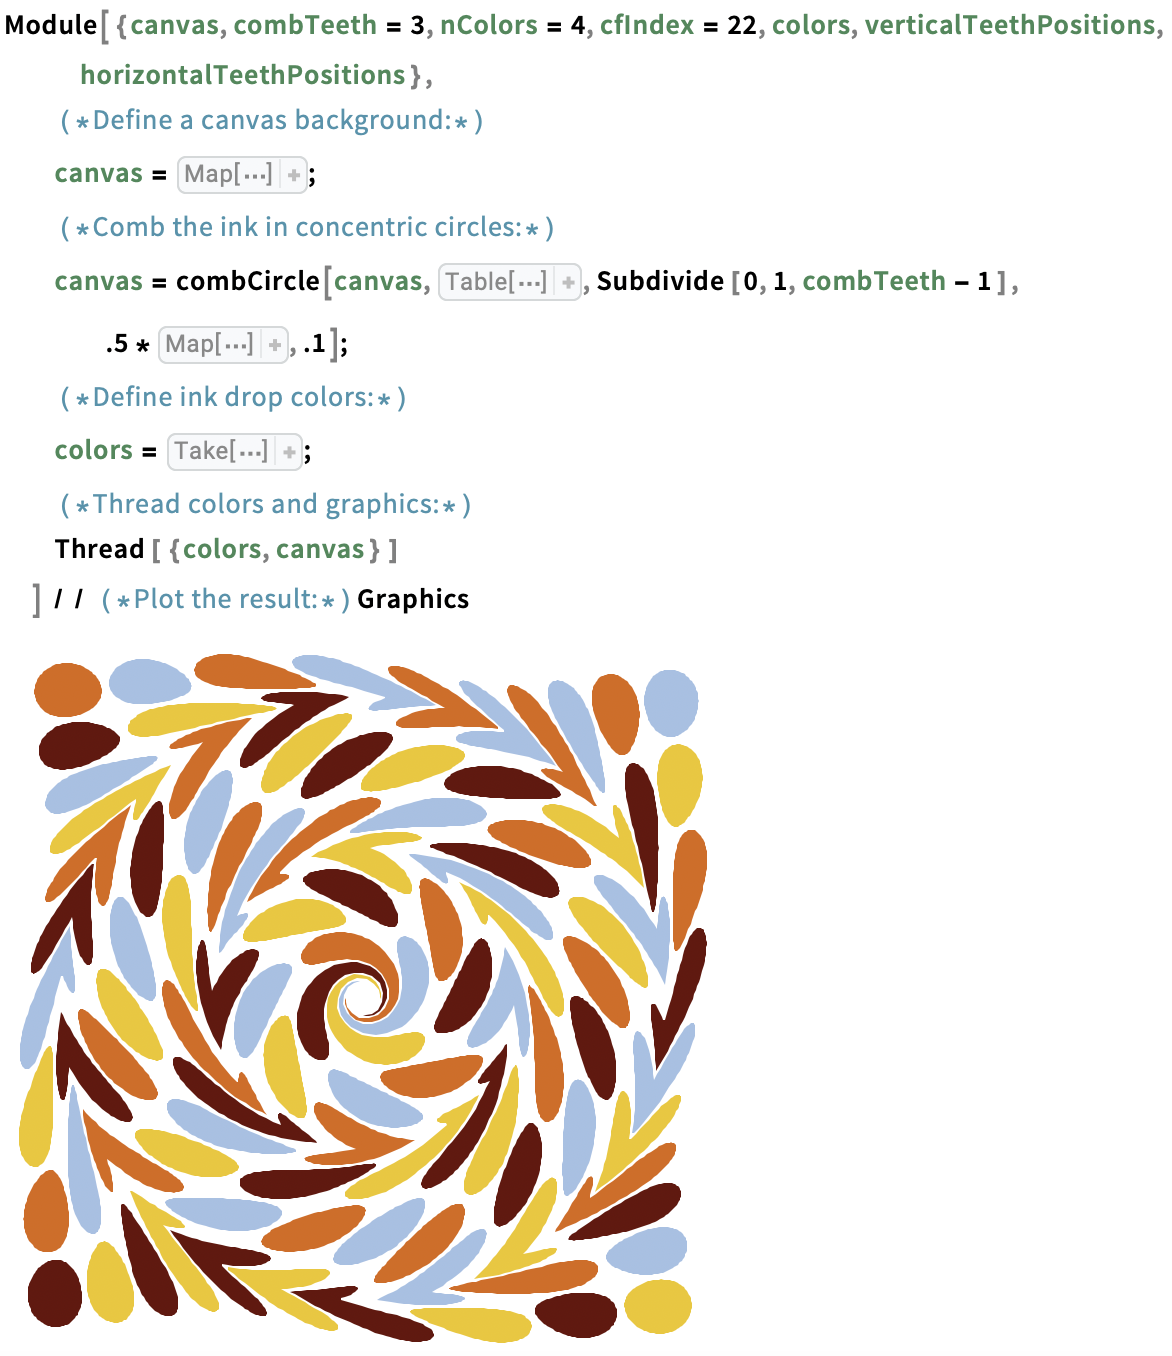
Using Module, it's easy to build up scenes by layering ink dripping and tine transformations.
Concentric tine circles in alternating direction through a grid of ink drops:
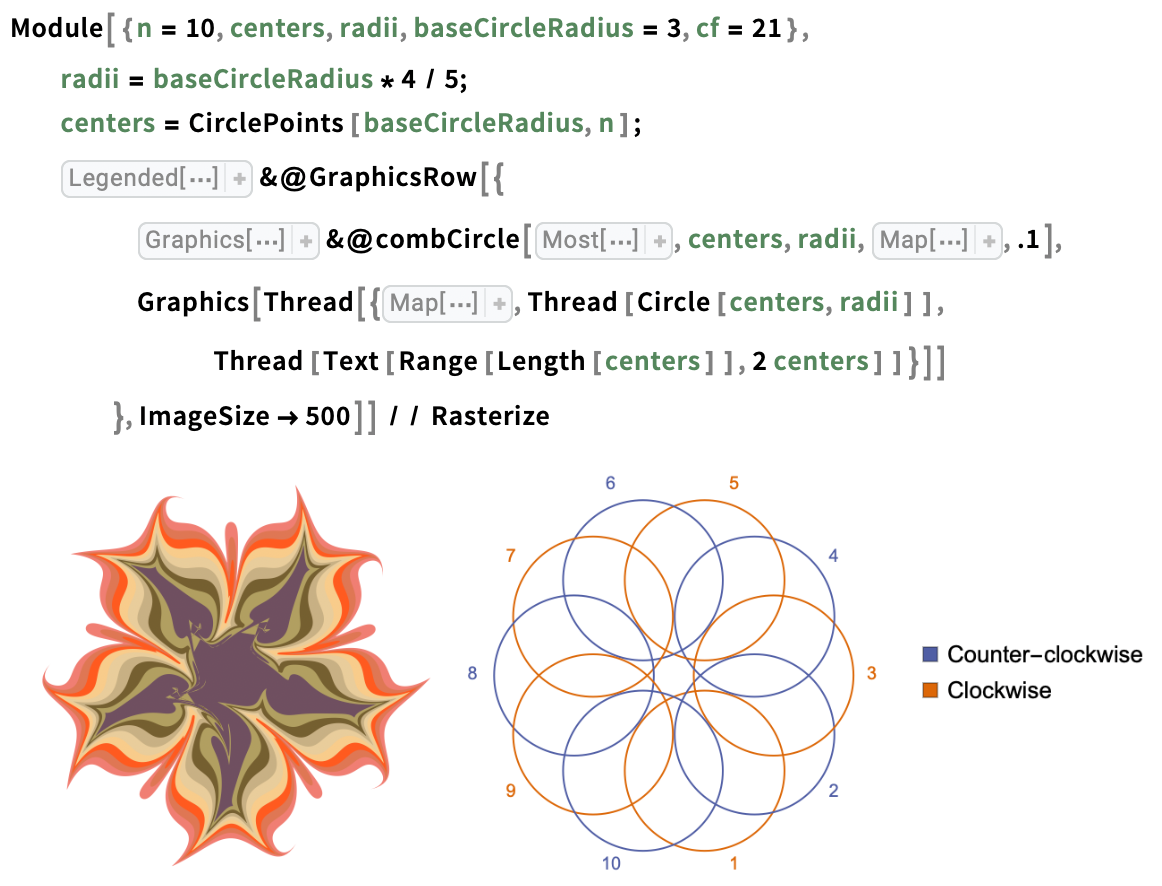
Trace tine circles centred on equally spaced points around a circle, alternating clockwise and counterclockwise directions through a stack of ink drops:
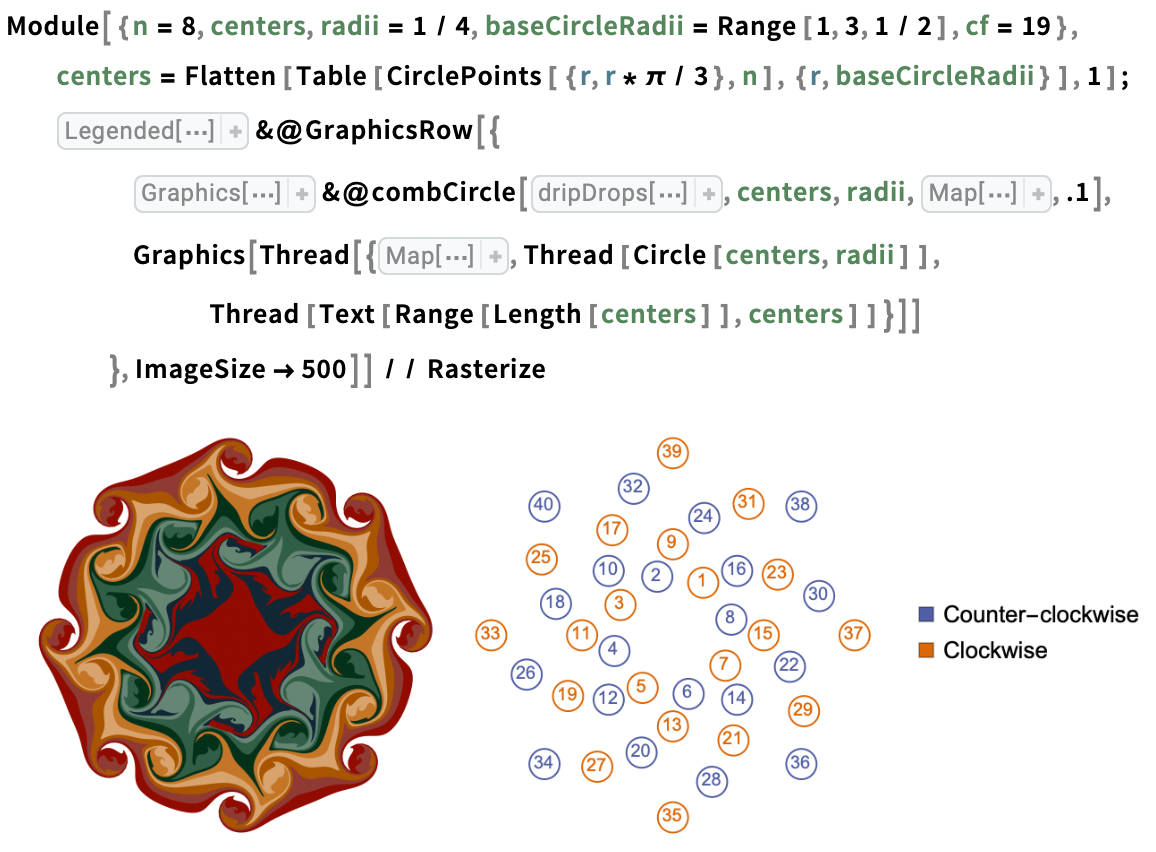
Trace tine circles through a stack of ink drops in alternating directions along the arms of a spiral:
Sampling Evenly Distanced Points on Polygon Boundaries for Custom Canvas Design Geometry
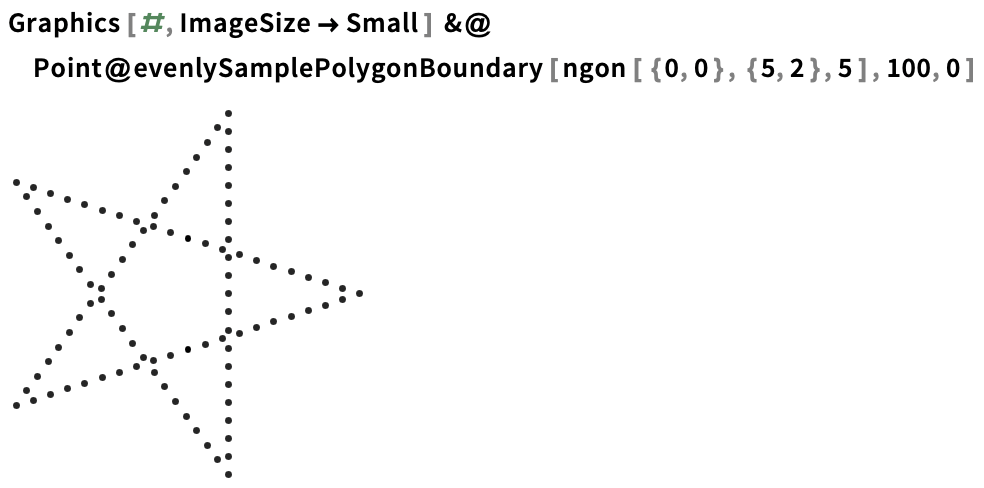
To achieve good results with manually prepared canvas geometry it's good to define polygons using roughly evenly separated points along their boundaries. High-detail polygons defined by a large number of evenly spaced points also deform more fluidly and naturally than low detail or varying detail polygons. To ensure polygons are optimally defined for marbling design it helps to be able to sample evenly spaced points from the boundaries of polygons. We can define a helper function for this.
Sample n equally spaced points on the boundary of a polygon:
- Based on Henrik Schumacher's answer on the Mathematica & Wolfram Language StackExchange: https://mathematica.stackexchange.com/a/180931/87521
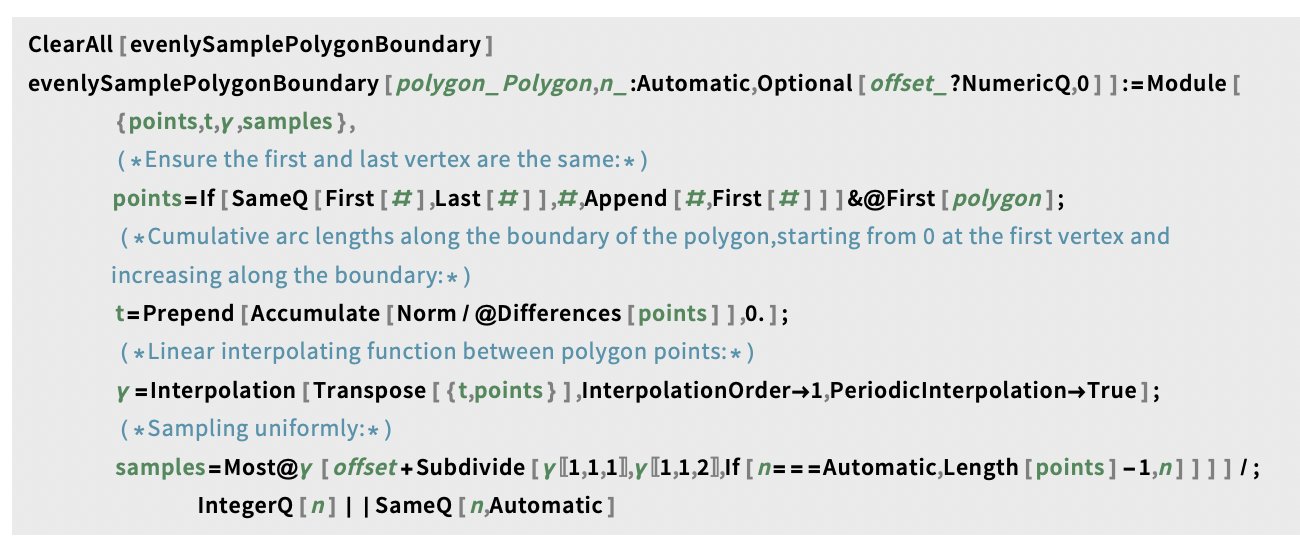
Example: Take a high-detail evenly spaced point sample from a low-detail star polygon:
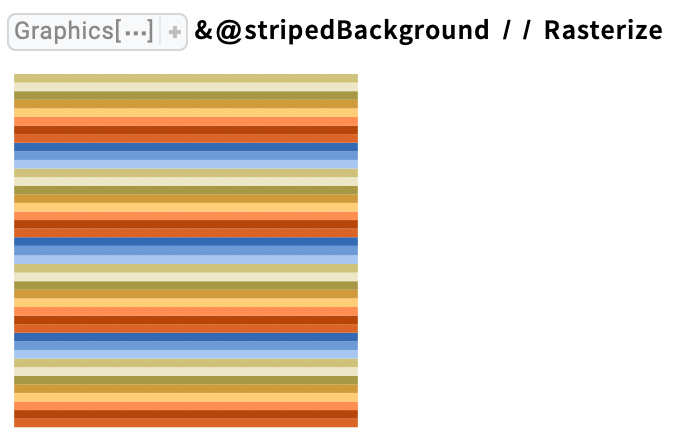
Let's use this function to generate a striped background as the basis for the next marbling design:

Preview the striped background design:
Simulating Real Marbling Design Techniques
By combining the functions discussed in previous sections, we can generate an infinite variety of marbling patterns, and easily experiment with marbling ideas. We can also reproduce pattern-making techniques used in physical marbling designs.
Peacock Feathers
The following pattern, sometimes called the peacock, bouquet, or scallop shells, is often found in end-paper designs:
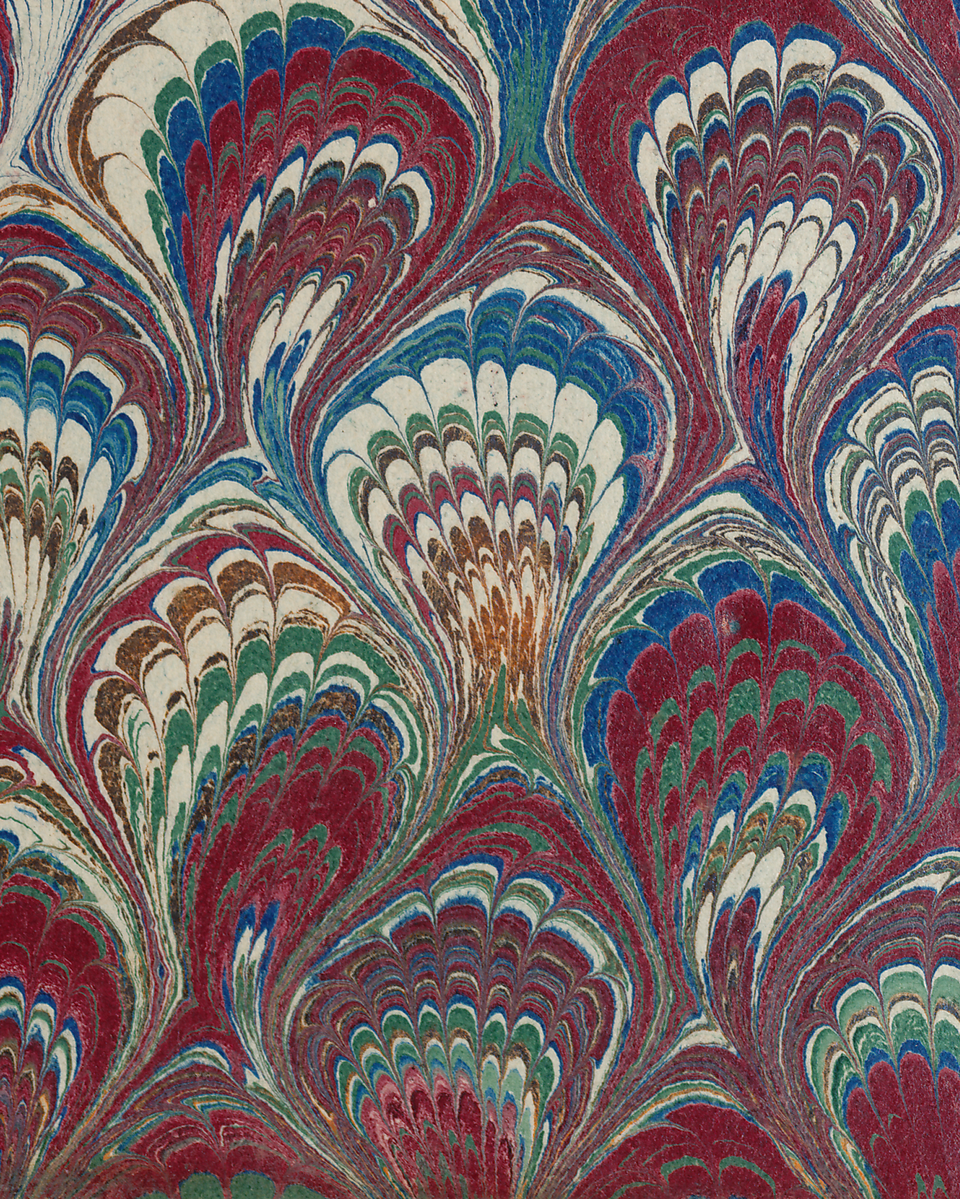
Marbled endpaper from Die Nachfolge Christi ed. Ludwig Donin (Vienna ca. 1875) - Wikimedia Commons
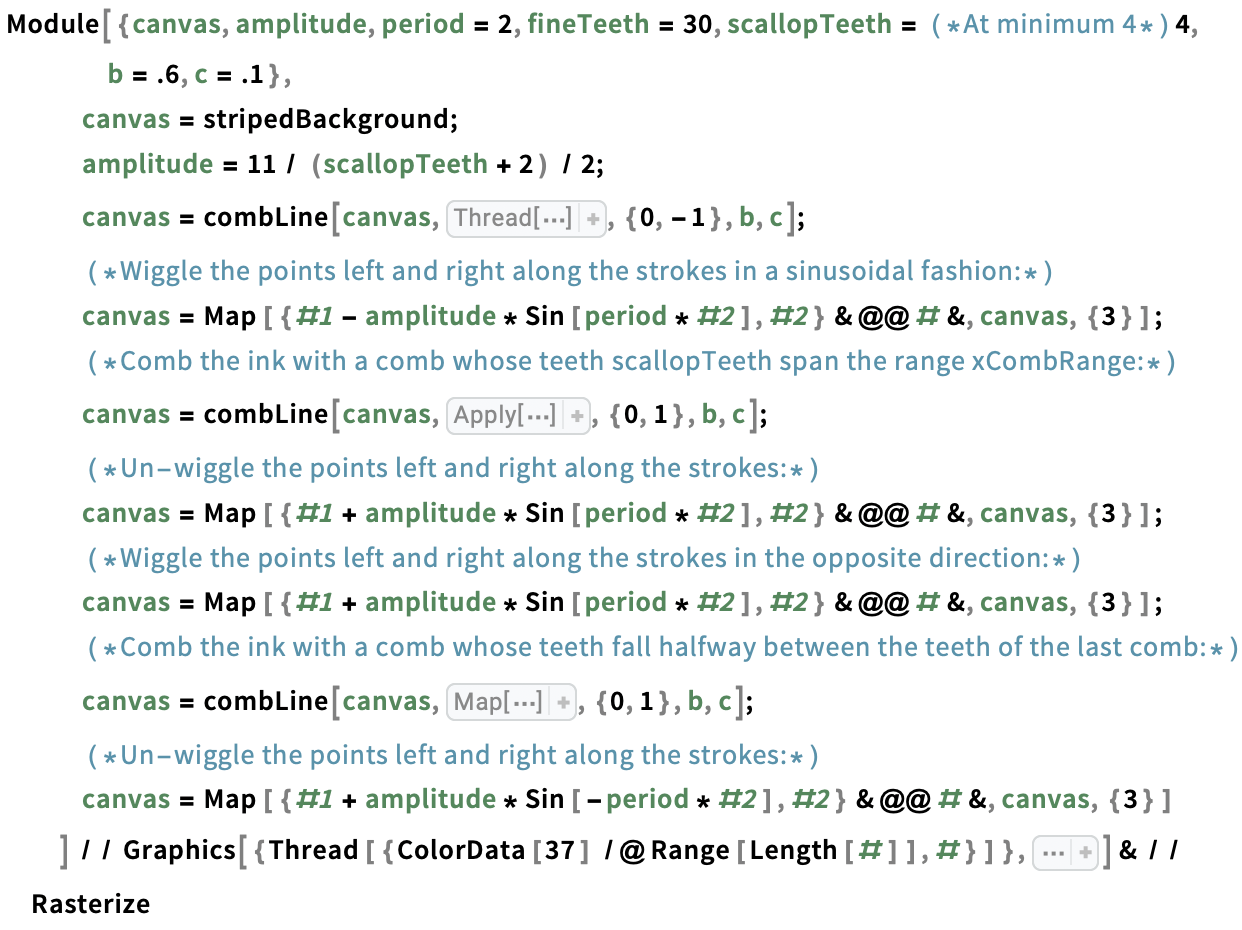
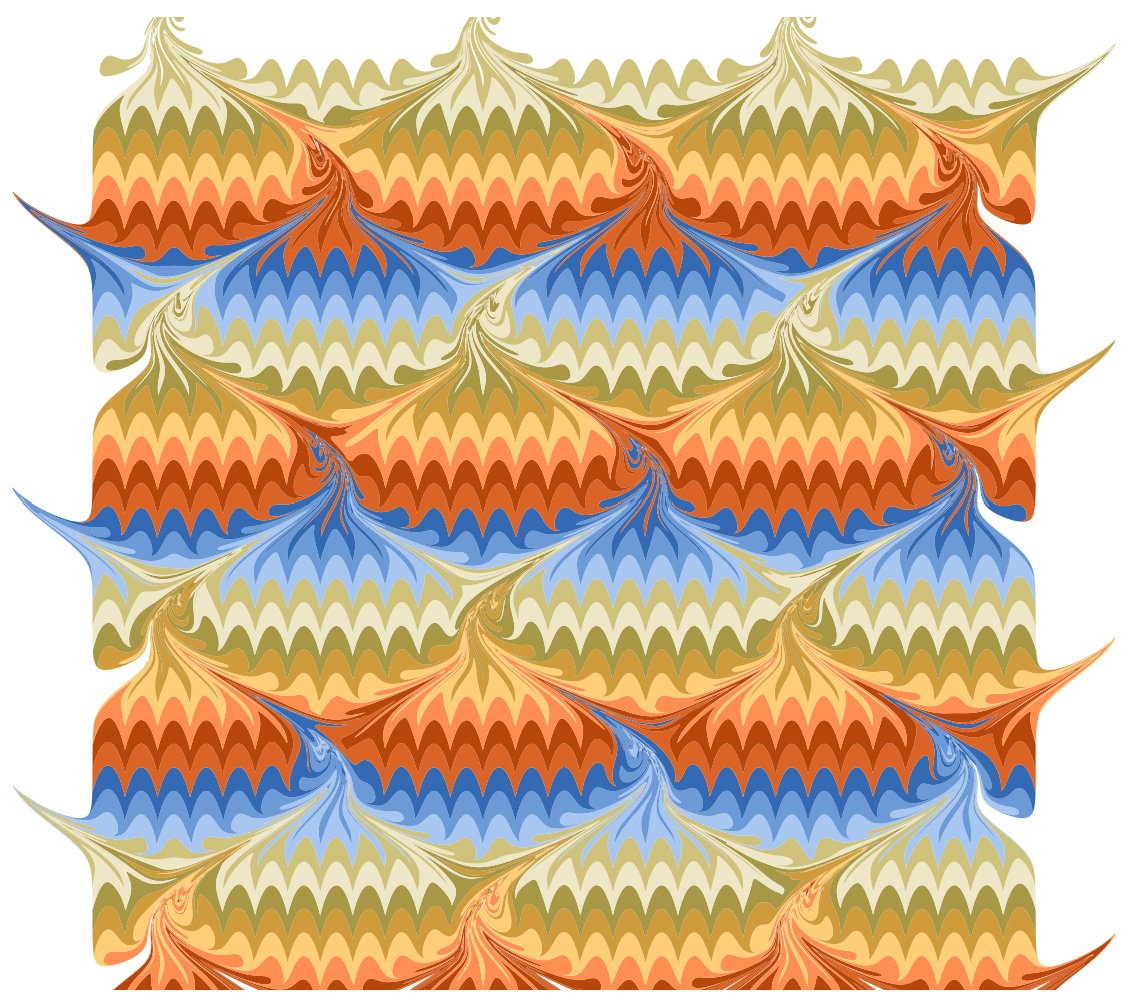
Following instructions from Aubrey Jaffer's website, we can reproduce this design by combining geometric sine transformations and tine combing, starting with the striped canvas defined previously. The result is very regular, and might benefit from additional displacement from 2D noise for a more natural effect, or from the addition of noise to the tine.
Create a perfect scallop array marbling:
Combinations of Dripping and Combing
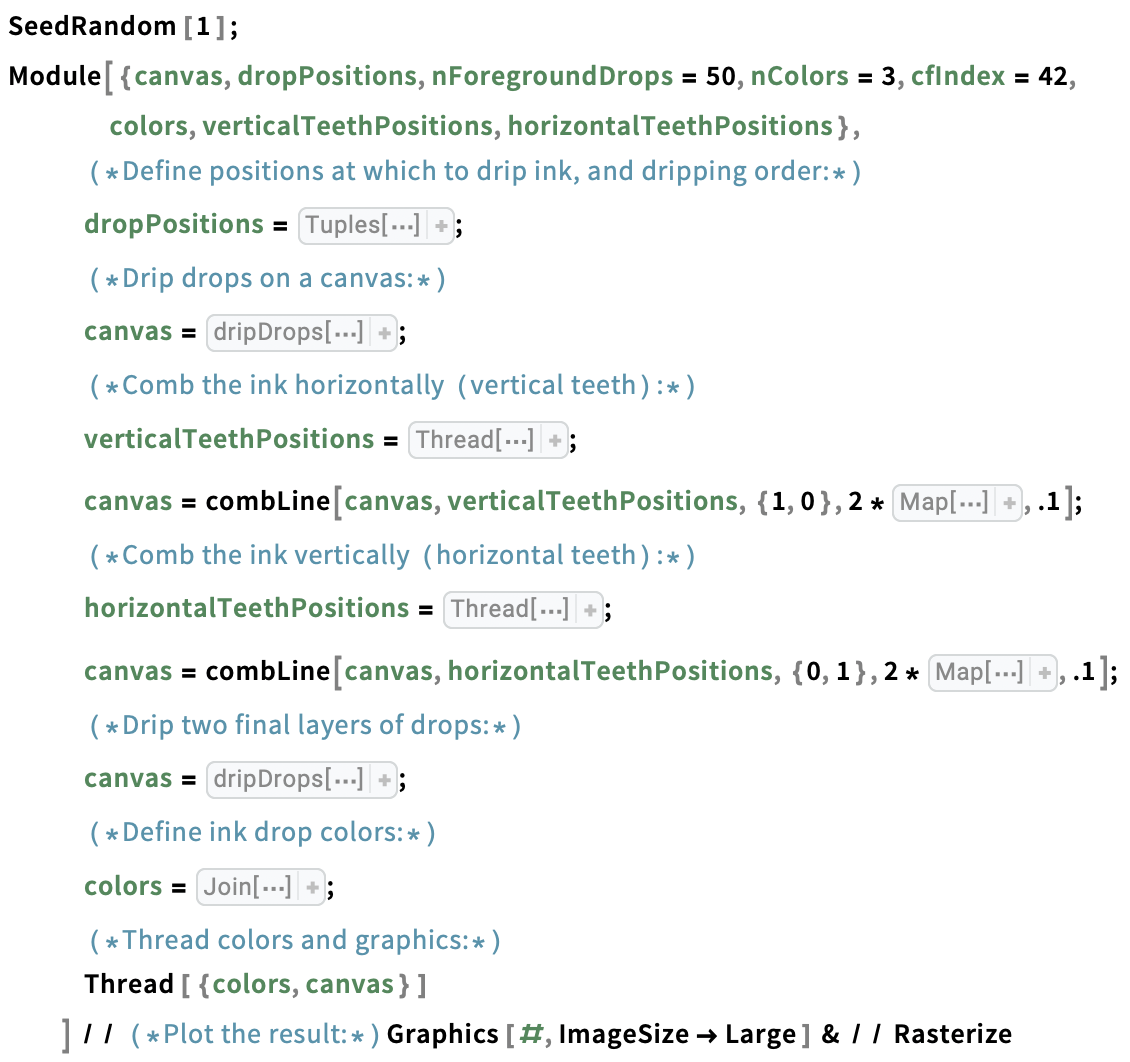
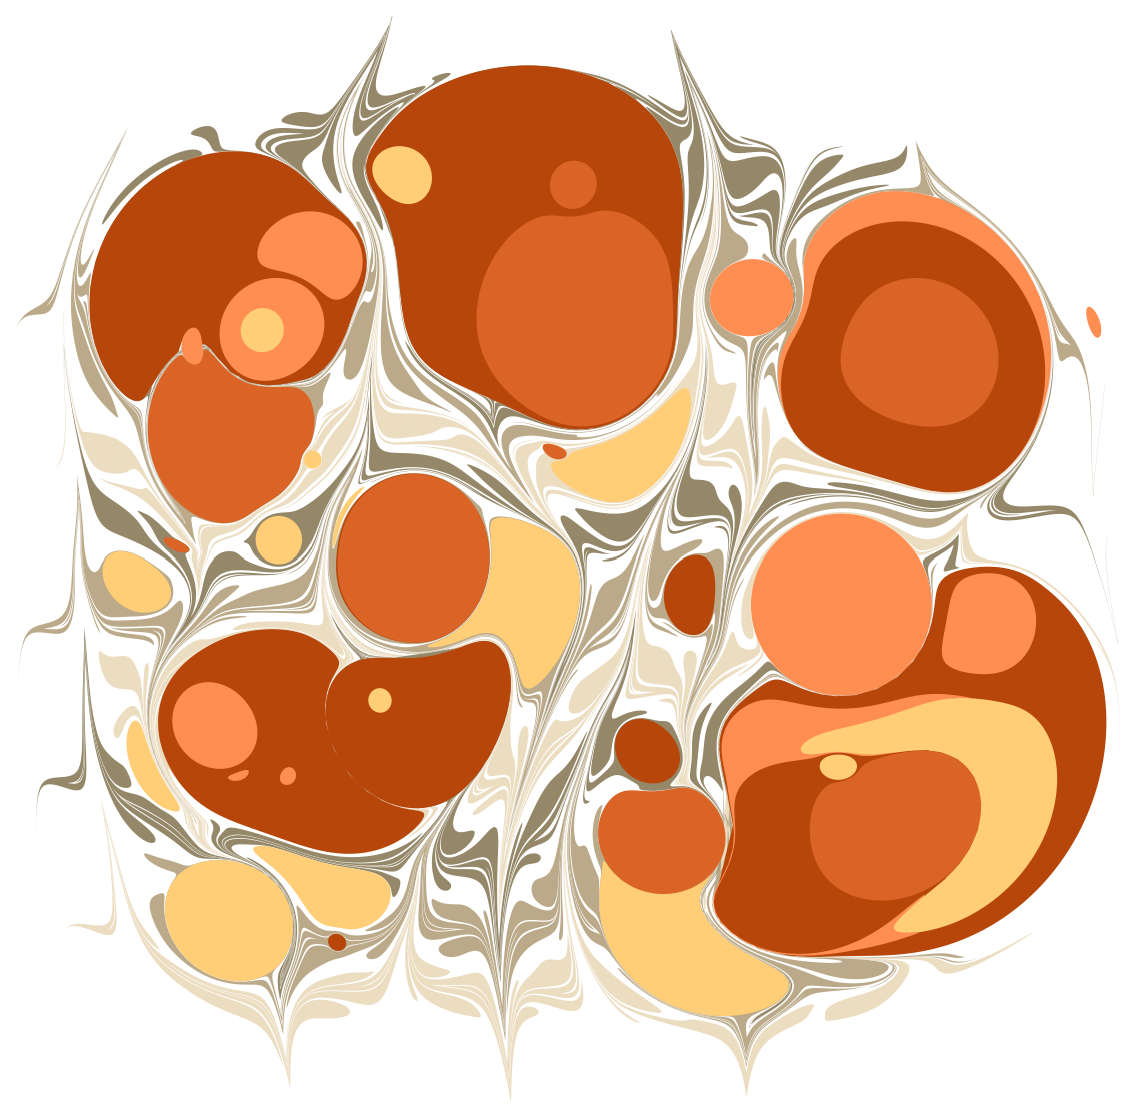
By alternating dripping and combing sequences, we can produce designs resembling ebru marbling. For example, by dripping, combing up and down, then dripping again with different colours:
Create a computational ebru marbling:
The Marble-Tron: An Interactive Marbling Canvas
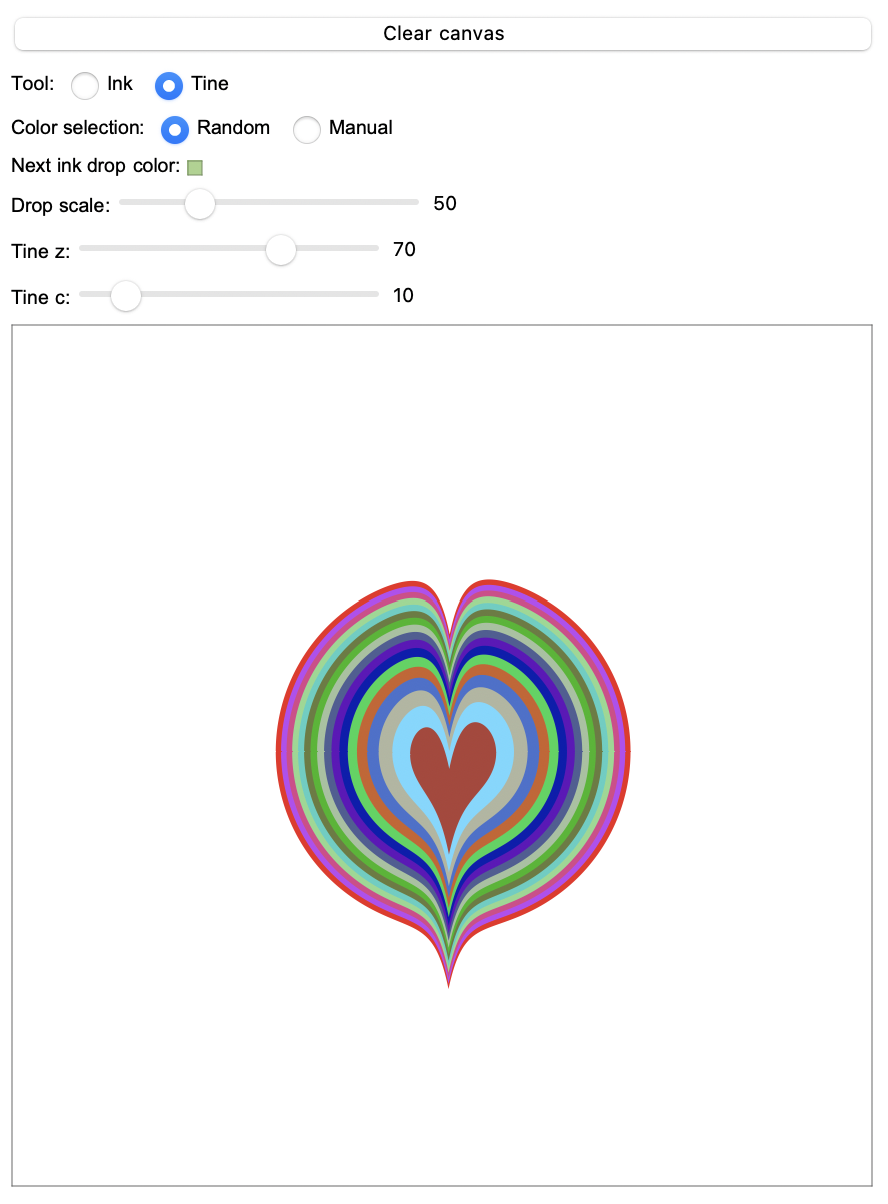
Download this notebook and make your own marbling designs with the interactive canvas below.
Usage:
- To add a drop of ink to the canvas, click the "Ink" radio button, choose your drop settings using the Drop scale slider.
- By default, the colour selection is random for each ink drop. Click the "Manual" radio button to show manual colour selection tools.
- To trace a tine line through the ink, click the "Tine" radio button, choose your tine settings using the Tine z and Tine c sliders, then click and drag the mouse along the screen. An arrow will follow your mouse pointer, giving you a preview of the tine settings. Release the mouse to apply the tine line to the canvas.
Screen capture of the interactive marbling canvas interface:
Conclusion
This exploration into mathematical marbling showcases the power and flexibility of Wolfram Language for generative art exploration, process design, and process implementation. By combining mathematical transformations, we can simulate traditional marbling techniques digitally, opening up endless possibilities for experimentation and creativity.
One advantage of the vector graphics marbling methods explored in this text is that a marbling process will always output a list of polygons, making it easy to pick and modify colour schemes without having to recompute the marbling from scratch. These polygons can also be magnified and exported without loss of detail for prints, or further manually or programmatically manipulated.
I encourage you to try out these techniques and create your own marbling designs! Happy marbling!
Acknowledgements and Sources Cited
Special Thank You to Aubrey Jaffer
This article would not exist without Aubrey Jaffer's mathematical marbling articles, his kind support, and advice at the 2024 Wolfram Summer School. Aubrey's work provided the foundation for this exploration, and his guidance has been invaluable. Thank you, Aubrey, for your dedication to the art and science of marbling, and for inspiring us to delve deeper into this fascinating subject, and thank you again for presenting your work at the 2024 Wolfram Summer School.


